Digging into the new cab

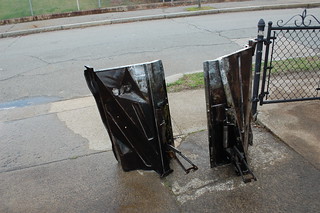
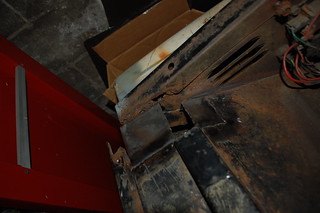
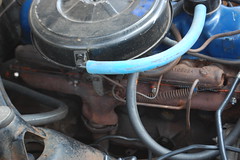
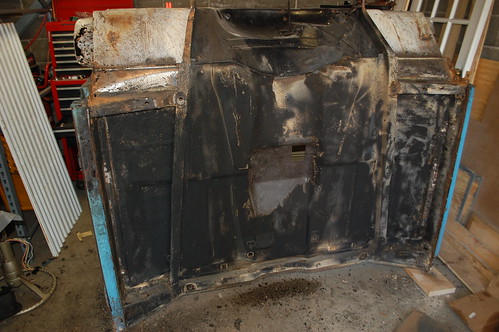
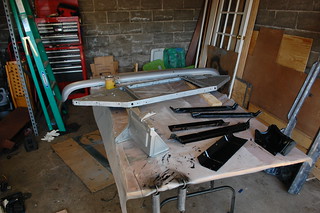
Got the new cab tilted on it’s back, and started digging into the underside.

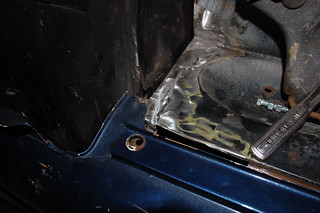
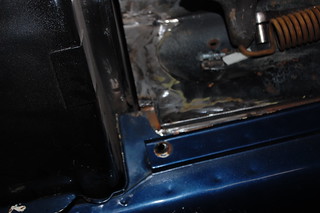
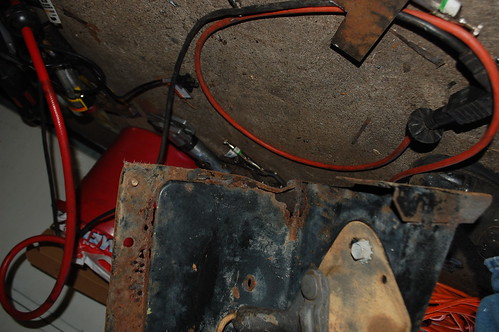
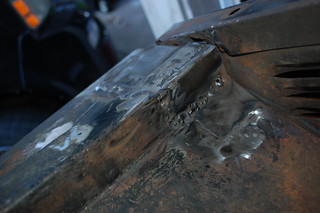
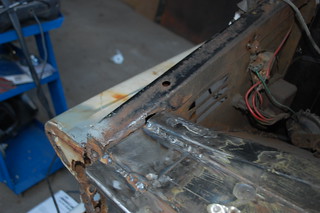
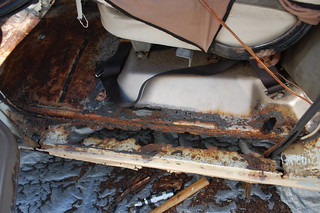
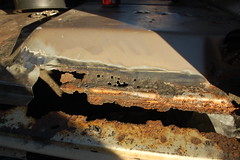
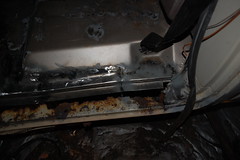
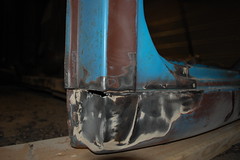
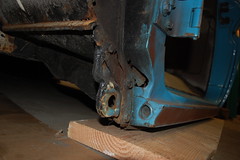
The outer rockers have been replaced already, but whoever did it didn’t actually fix the rust under them, just covered it with new rockers. I knew about this, so I’ll have to cut the new outer rockers off to properly fix the stuff behind them(inner rockers and lower front pillars).


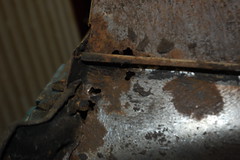
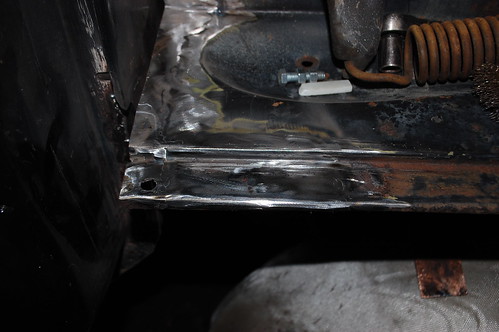
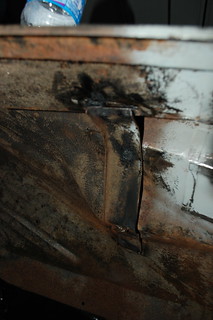
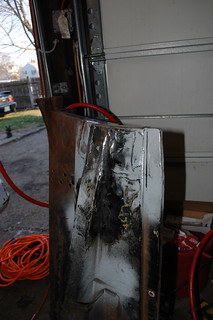
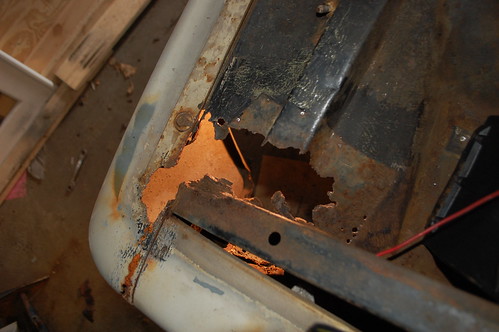
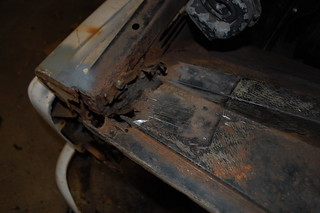
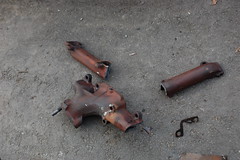
Also found rust in all four cab braces, floors in front outer corners, cowl vents, & cowl panels below vents.


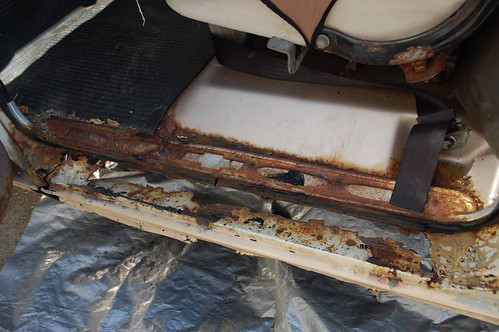
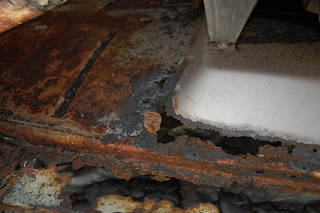
Annoyingly, I found out the cab corners *were* replaced, but done very badly and covered with bondo. Those are coming out too, to be done right


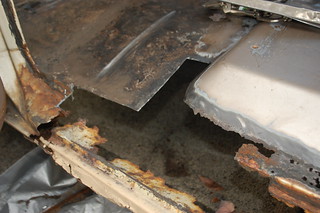
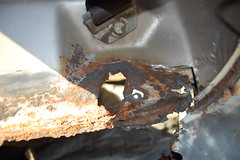
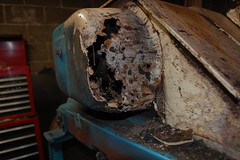
As bad as this all looks, It is still better than my other cab. I have everything to fix it except 1 cab brace & the lower front pillars. I’m going to form the patches for the cowl vents as those are invisible under the fenders.


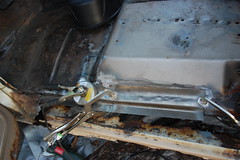
I’ve decided that the cab is a low priority, I’m going to get all the rust *on* the truck delt with, then swap the cab over. However I wanted to mess with the cab a bit, so I decided to knock something easy out first.

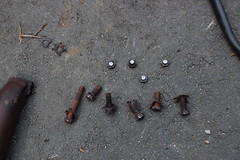
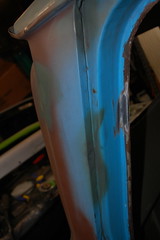
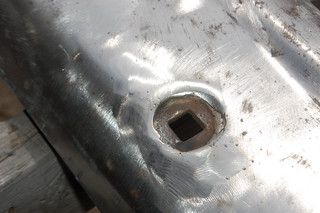
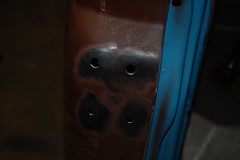
This cab was from a deluxe trim truck (like the other ’64 I had), so I need to weld up the 4 sail panel screw holes, and the 4 larger side trim holes. I may put the side trim on this truck later, but if I do I’m going to used double sided trim tape.


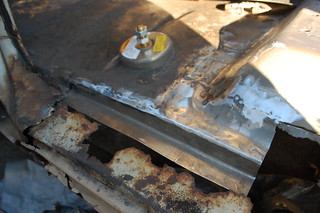
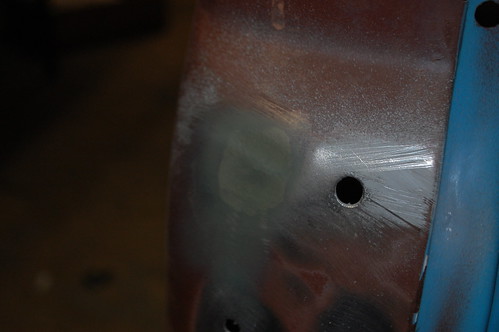
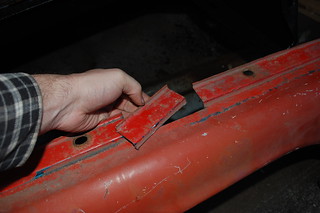
For the small sail trim holes I just removed the paint and filled the holes with the welder & ground them smooth.


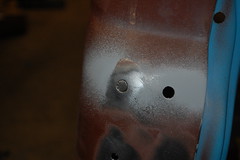
For the bigger trim holes I’m making small circular filler pieces and welding those in. A skim coat of filler and these should be perfect.


Bumper? I hardly know her…

DSC_9737

The front bumper on the truck looked like hell when I bought it, when the truck was all battered it fit in well, but once I planned to re-do it, I knew the bumper was going to need help.

DSC_2921


Back during dis-assembly, only one of the eight bumper bolts simply unscrewed. Of the rest three snapped off and four had to be cut off.


DSC_2997
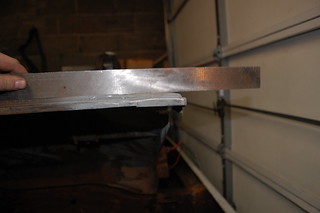
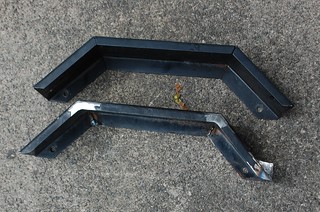
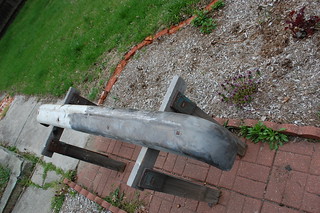
So once the bumper was off, I stripped it of several layers of white paint, and ground down all the surface rust. I was pleasantly surprised to discover it doesn’t appear to be bent, and doesn’t have an dents in it.


DSC_3087
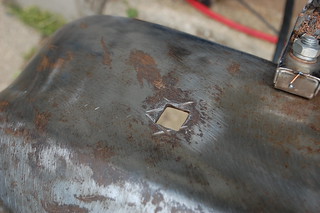
Before I could start the repainting, I had to address the gouge I’d made with the cutting wheel when I cut the various bolts off.


DSC_3088


First I filled them in with metal using the mig welder, then ground them smooth. This sometimes took a few rounds to fully fill them.


DSC_3093

The end result was something that, after primer & paint would show no sign it had ever been damaged and would be a stronger part of the bumper than if I’d just used filler.


DSC_3124
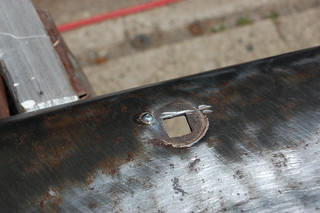
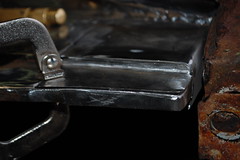
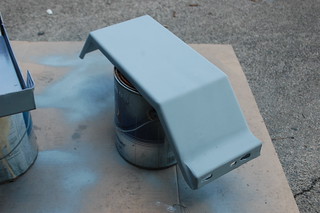
Once that was done the bumper was coated in MasterSeries & primer like all the other parts.

Inner fenders, done!

DSC_2966 I finally got the last of the welding on the inner fenders completed. I cut the rusted lip off the back and made two patches to replace that area. I tried to make it easier on myself by removing the step down at the back edge(on the left in the picture above. This caused an issues as you can see below. DSC_2976
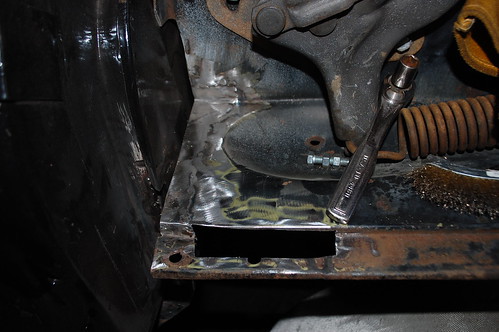
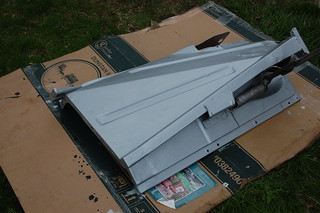
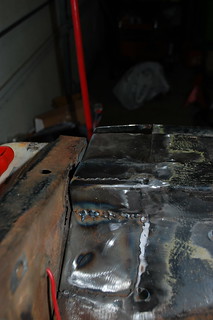
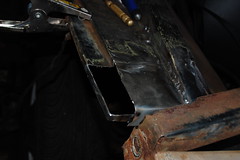
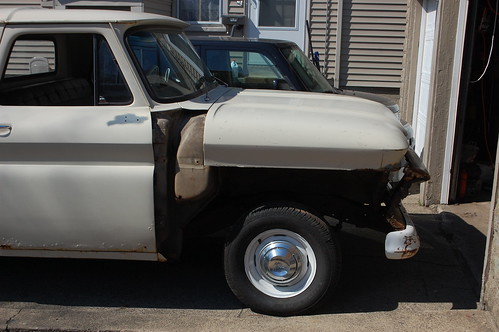
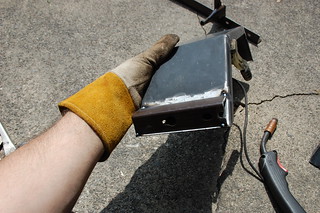
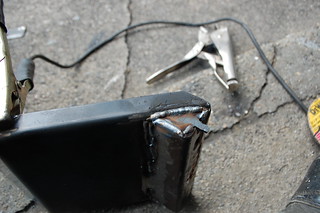
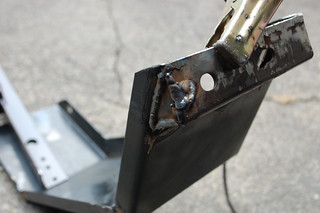
But first I needed to patch the other section that you can see cut out above. There is 3 bends here that needs to be carefully made so everything lines up. I got a brain wave and measured the lip at the top of a junk fender I had. Everything appeared to match so I cut out a section.   DSC_2977 
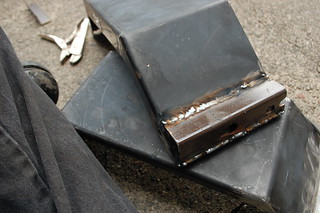
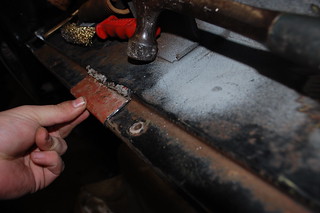
I flipped the piece over and tested it, the bends are an exact match. I carefully trimmed it and the fender edge to fit and tacked it into place.       DSC_2978 
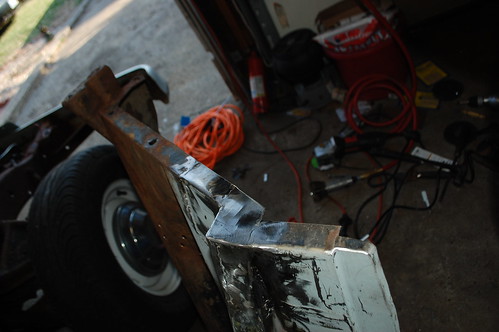
Here it is tacked in place, please ignore the terrible welds from forgetting to turn on the shielding gas on the MIG.   Below is the piece with the welding finished & ground down. DSC_2979 DSC_2974

As I mentioned above, the lazy way I decided to fix the back edge bit me in the butt. I tested fitted an outer fender and realized I’d forgotten this little flange that fits over this spot.


DSC_2980

I pondered just cutting the flange off on the outer fender, but decided I’d rather have it so any fender could fit here. So I cut the corner where it overlapped, flipped it over and welded it in place.   DSC_2969


Then the repaired battery box brace was welded back on, and the repairs to the inner fenders were done.


DSC_2984


I chucked a wire cup brush in my angle grinder and ground all the loose rust off the inner fenders and gave them a good scrubbing to get any last bits of grease off.


DSC_3000

Then they got two coats of Masterseries anti-rust paint. After they dried I gave the m a coat of black paint and a coat of truck bed liner. The finished liners then got installed, which will show up in another post.

Patching the inner fenders continues

DSC_2906
With the front end torn down, I could finally weld up the front of the passenger inner fender. As I don’t know what this was supposed to look like as mine is completely gone, so I went with something that looked right. I still need to measure & re-drill the two bolt holes.

DSC_2909


Then I drilled out the spot welds for the bracket that supports the battery tray so I could fix some rust caused by crud trapped between it and the inner fender. I think the spot weld cutter is my new favorite tool.


DSC_2910


The offending rust holes, you can see welding slag from my attempts to patch it without removing the bracket.

DSC_2912


New patches welded in, for some reason I could no get a decent pic of these. I think all the shiny metal confused my camera.

I also cut off the nut on the bracket that had a snapped bolt stuck in it and welded in a replacement.


Next up, the rust on the rear of the panel.

DSC_2918

Oops.

DSC_2889 DSC_2890As I was tearing down the front end, I found a screw up in my prior welding work. I didn’t notice at the time that the heat of my welding had warped the second patch downwards on the passenger side. It is significant enough that the bolt hole for the rad support would be too close to the top to actually get a bolt in.

The fender flange also has a similar bend.


DSC_2892


I ground & cut the welds along the side, bent the whole thing upwards, and tacked it in the right place. There is now a gap along that edge, so re-welding it was extra fun.


      DSC_2893


Much closer now. The outer corner is still a bit low, but I should be able to fix that with some hammer work once the inner fender comes off.

More welding work

DSC_2777

In the continuing adventures of my rotted out ’64 Chevy truck. Today’s plan was to get the front of the passenger inner fender repaired enough that I no longer need the core-support in for reference. As a reminder, this is what I started with.

DSC_2816First patch went in.


DSC_2822

Second patch went in

.


DSC_2826Third & fourth patches went in.


Then I started fabricating the end of the fender mounting flange.
DSC_2827DSC_2830

The corner all welded up. As before, once the radiator support comes off I’ll be finishing up the grinding and re-doing some of the crappier welds as I’ll be able to reach them easier.
DSC_2837

The beginning of the welding work

DSC_2788

This year’s project with the ’64 pickup is to get the rust fixed so I can get some paint on it. To that end, the front end was stripped down so I can start start in on the incredibly crusty mess.

DSC_2757The first target is the inner fenders. The front edge has a bracket on the underside from the factory that traps muck thrown up by the tires and always rusts out. The ones on this truck were previously “fixed” with super thin sheet metal pop-riveted on and covered in roofing tar. This worked so well the patches had rusted through as well.

DSC_2792I started in on the driver’s side by cutting out the rot until I reached good metal. I’m doing this with the radiator support still in place so I can use it as a guideline to make sure everything lines up. Once I have both sides done the rad support will come out so I can finish the patches & so I can fix the massive rot on the support.

DSC_2793 I set up my metal bender in a convenient location, then it was just the tedious process of cutting, bending & fitting patches. I am using 18ga steel for strength, so my flanging tool doesn’t make the flange deep enough to be flush. I’m not too worried as this area is not visible with the hood down.

DSC_2794One patch in…


DSC_2797Two patches in…


DSC_2809And patches 3-6 in.


DSC_2811 Then two more patches to replace the fender mounting flange.


It is far from perfect, and there is a lot of grinding still to do(as well as re-doing some of the uglier welds), but it seems solid. Once the radiator support is out I will need to add one more patch to the front edge of the raised portion, and drill out the various bolt holes.

The start of rocker repair on the truck

When I bought the ’64 Chevy I knew the worst rot on the truck was in the driver’s rocker area, the whole area was rotted badly enough you couldn’t step there without the whole thing crunching and feeling like it would collapse at any second.

Part of my plan with this truck is to fabricate metal repairs wherever possible, so I could practice metal fabrication, and save money. With the rocker I decided to buy a replacement outer rocker, but fabricate the inner stuff myself.


I started by pulling off the sill plate(which was a ruin in and of itself), and made a pass with my Harbor Freight sandblaster to find all the rust holes.


I was left with very little good metal. It quickly became clear that the decorative sill plate had become structural, and was stronger than the remaining rocker.


So first I cut back to solid metal, getting rid of all the marginal stuff so I knew I had a solid base to start from.


Then came the first of four patches. I formed the right angle bends with the help of a brake, but the rest was hammer formed using whatever around the garage had the shape I needed.


Then it(and the second filler patch) was welded in and ground smooth.

.


Then the second patch, before and after.


And the third. This patch only got tack welded in before I ran out of light.


Then between Hurricane Sandy & selling the wagon I haven’t gotten back to it. But the floor is already noticeably more solid with just this much completed.

Upgrades to the Wee Trailer

The wee trailer has served me well for over two years no matter what I threw at it, and despite a lot of abuse it just kept going. However it was due for a bit of maintenance, so I decided to fix several issues at once. As you can see in the pic above(the trailer is upside down in that shot) the license plate is utterly mangled from getting caught every time I tip the trailer on end to store it. And this is after the original bracket broke off. Also the tail lights were moved to the fenders after those brackets broke, but they point to far up and aren’t easy for other drivers to see. So While I was greasing & adjusting the wheel bearings I decided to fix those once and for all.

As the house is eating most of my money, I decided to see if I could do this with only stuff I had around. So I dug out a now extra bed frame, and cut a piece off to serve as the new tail light bracket. I tacked it to the bottom of the fender.

Then I finished off the welds. After grinding the welds down I added a few more tacks to fill any low spots and ground that smooth, continuing until it looked decently smooth.


To save myself a lot of effort, I cut the bed frame so I could use the existing hole as places to bolt the tail light. On one side this meant another hole was on the edge of the cut, leaving this small cutout.


I wanted to cap the visible end of the bracket to make everything cleaner, so on this side I added a tab to the triangular filler piece.


This is the filler fitted into place, don’t take this image as a sign that I am an amazing fabricator, I was surprised as hell that I managed to get it to fit this well.


Then welded the cap in place. Once it was welded in I hammered over the tab and welded that in.


And fully welded.


One bracket built, compared to the unmodified fender.


Once the brackets were attached, I cut the fender out behind the bracket so I can reach the bolt on the lights.


I also welded the seams on the fenders for strength, and to allow me to grind them smoother. Also barely visible in this shot is that I smoothed the corners.


Fender with a coat of zinc primer. I didn’t worry about getting everything perfect as they are going to live a hard life anyway. Also I was planning to use the hammered metal spray paint, which covers a lot of sins.


I also wanted to build a sturdier license plate bracket, hunting around I found these brackets from a dead garage door opener. The curved one turned out to be perfect.


The completed bracket.


Installed on the trailer, and painted with hammered metal paint.


And the finished, re-assembled trailer. At some time soon I’ll need to replace the decking, at that point I’ll repaint the main frame. I also ground the rust off the rims and shot them with some leftover graphite paint from Box’s wheels.


the manifold exhausting attempts to fix the exhaust manifold.

As I have said before, the exhaust manifold on the “new” engine was cracked, so I needed to pull it and swap the good manifold from the old engine. Ford sixes are notorious both for cracked manifolds and for the bolts rust-welding themselves to the head. A fun combination. So in the days leading up I sprayed the bolts with PB Blaster and Freeze Off. Once I started in I used a bolt extractor to get a grip on the badly rusted heads.

End result was six bolts actually coming loose, four snapped off bolt heads and one bolt who’s head stripped badly without shifting. I spent the next while trying to shift the stubborn bolt, I tried the bolt extractor, vise-grips, welding a nut onto the head and probably a half-dozen other things without the slightest sign of movement.


I finally gave up and cut the head off with an angle grinder, and pried the manifold off in pieces. The places it snapped in the pic are not where the cracks were, but just the result of overly enthusiastic prying. Fortunately I didn’t need this piece anymore. Frustratingly, the bolt that had given me so much hassle and wasted so much time, once the manifold was off it came out in moments with a pair of vise-grips.

Once the manifold was off I still had the problem of the four bolts that had snapped off. I was lucky in that they hadn’t snapped off flush, but I still couldn’t budget them. Vise grips would just chew them up, and attempts to heat or freeze them didn’t do a thing. I even tried welding a nut to them and putting a wrench on it. All I did was snap the nut back off.

Finally I gave in and decided that if the bolt wanted to be a permanent part of the head, I would take advantage of that instead of fighting it. So I cut the bolt back about half way with an angle grinder to get a flat surface. Next I cut the heads off some short bolts and chamfered the ends to give my weld someplace to bite.


Then one by one I welded the new bolts to the old once, effectively creating a stud I could put a washer & nut on. Because I was working down in the engine bay I had no good way to get the pieces aligned perfectly straight. So after welding each one I had to grind the welds down and test fit the manifold. I was lucky in that they all ended up straight enough to allow the manifold to slide on and off easily.

Add some stainless steel hardware & a new manifold gasket and the project was done.