Laying the truck bare

DSC_2872
DSC_2873
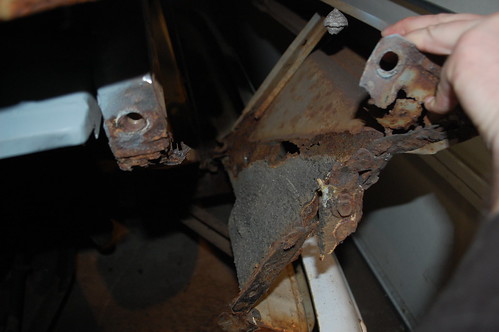
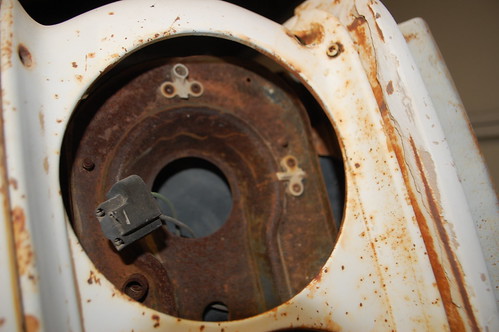
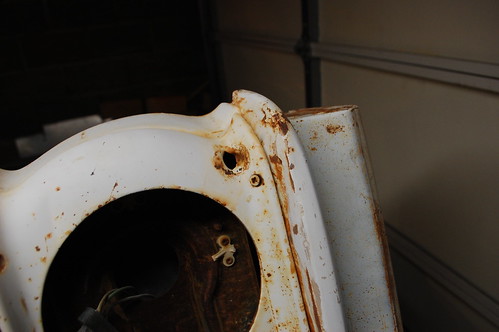
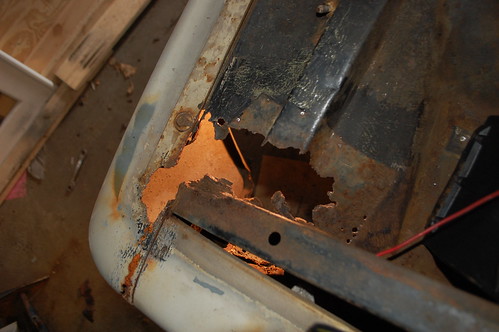
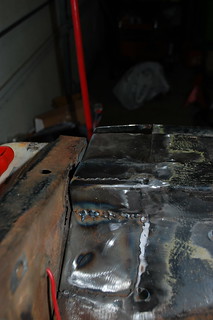
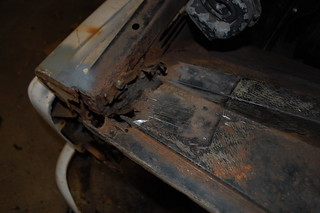
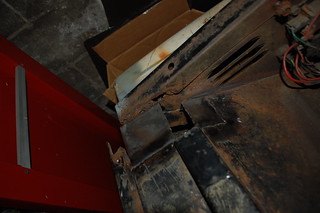
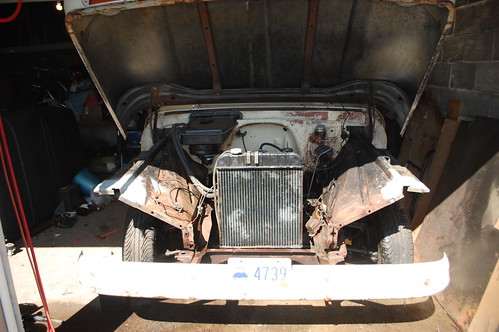
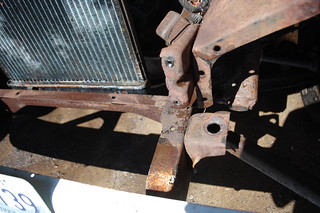
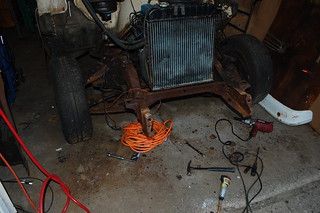
Once I had the front of both inner fenders patched, it was time to strip the rest of the front off. First the radiator support came out, which was just as much of a rusted ruin as I thought. Fortunately though the frame where it mounts was fine, which means at least the frame doesn’t need repair.

DSC_2891


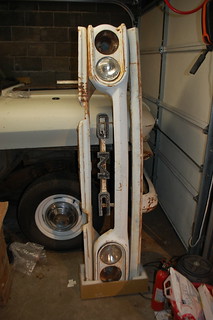
Next off came the hood with the assistance of my weekly gaming group.


DSC_2894


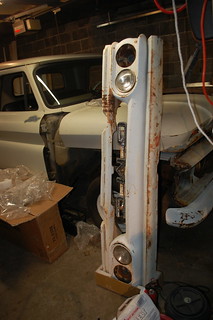
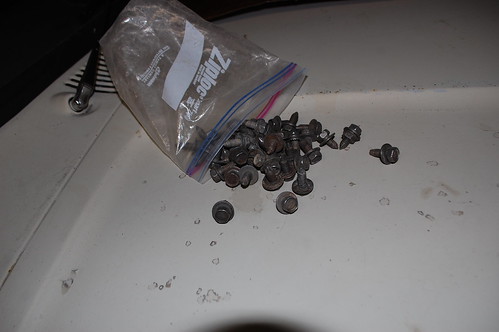
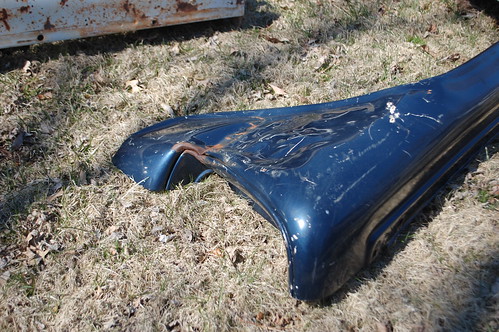
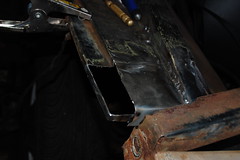
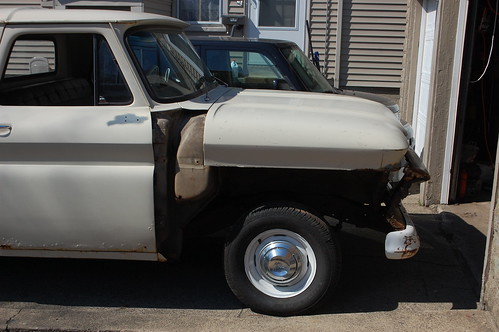
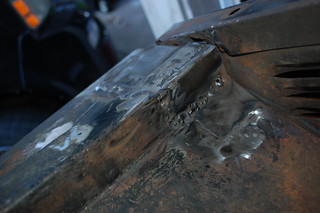
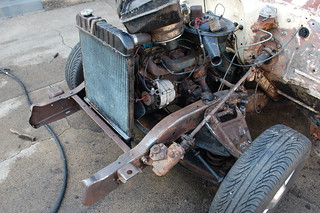
Then off came the inner fenders. All of this so far had come off with minimum fuss, next up was the bumper though, which put of a hell of a fight.
DSC_2920

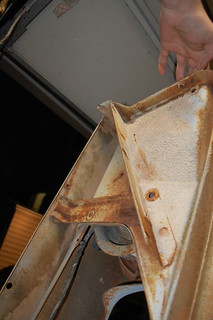
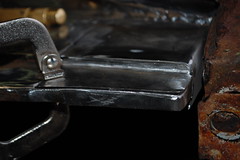
The final tally when the bumper & brackets were removed was 3 snapped bolts, and 4 that needed to be cut off and 1 that actually came out intact.

DSC_2933

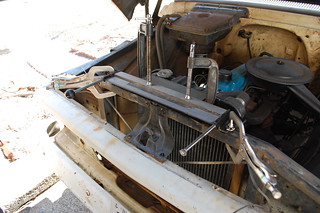
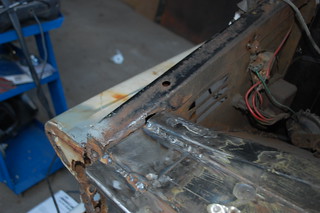
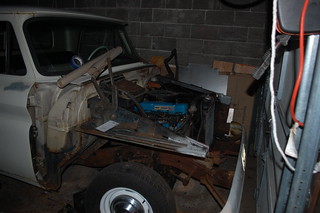
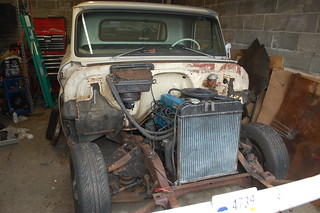
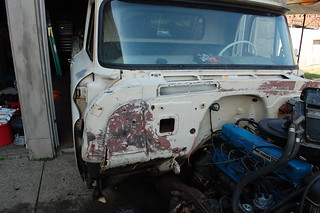
Once everything was off, I was finally at the point where (hopefully) the truck wasn’t going to get any worse and would hopefully start looking better.

DSC_2941


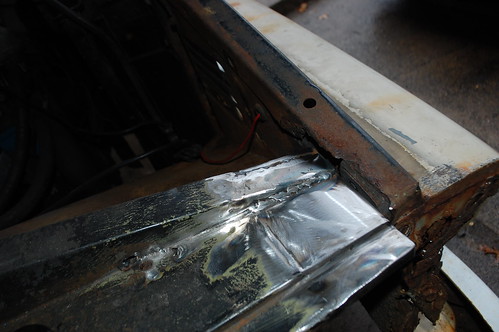
To that end, I ground down the surface rust on the exposed parts of the frame and firewall to start painting them. I am using paint designed for tractors in hopes of adding durability. The firewall is supposed to be the same color as the truck, but I decided to have it match the other panels in the engine compartment.


DSC_2961


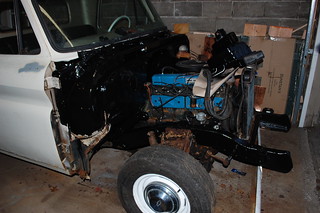
After a round of painting this is what I ended up with. It looks really good in this shot, and while the frame came out great, the firewall ended up with a lot of runs & drip marks. I’m going to put a coat of truck bed liner on the firewall to make it look smoother & stand up better to oil & grease.

Truck bits acquired, part 2

As I noted before, my grille panel looks like this:

DSC_2865

I was dreading trying to fix that, and I was also looking for a GMC dual-headlight grille. A solution for both these problems came in the form of a grille & panel together that a guy on the truck forum I hang out on was selling.

DSC_2857DSC_2860

For $235 shipped form AZ I got a rust free & fairly straight assembly that is cheaper than a new grille panel alone. It will need some cleanup & dings fixed, but it is miles better than what I had.

DSC_2863DSC_2858

DSC_2862

The only real issues are the missing outer buckets, a dent above the right headlamps, and a bullet hole next to the right outer headlamp. Honestly the bullet hole may stay, as it is pretty cool looking.

DSC_2867

I’m not sure yet what will replace the GMC letters. I have seen some people use a Buick grille piece there, but I would really love to find a set of Chevrolet letters that are the right size so it looks kind of stock.

DSC_2869Also, when I bought the grille I asked if he could send me the mounting hardware, and offered to kick in some extra $$. He said he didn’t have the original bolts but would throw in some spares for free. What showed up was 30+ original style bolts already stripped of rust & paint. This should be more than enough to replace all the snapped/busted ones. Hell of a nice guy.

DSC_2884

The day after the grille arrived I went to the first Swap Meet of the season at Stafford Speedway. Spent 3.5 hours wandering around looking at other people’s junk. I always intend to take lots of pictures, but it is so busy & exhausting that always falls by the wayside.

DSC_2885

I did pick up this fender for $60. Why did I buy a badly dented fender? It has absolutely zero rot, and the dent is in the only place my fender doesn’t have rot. So I’m hoping I can combine the two into one good fender.


More welding work

DSC_2777

In the continuing adventures of my rotted out ’64 Chevy truck. Today’s plan was to get the front of the passenger inner fender repaired enough that I no longer need the core-support in for reference. As a reminder, this is what I started with.

DSC_2816First patch went in.


DSC_2822

Second patch went in

.


DSC_2826Third & fourth patches went in.


Then I started fabricating the end of the fender mounting flange.
DSC_2827DSC_2830

The corner all welded up. As before, once the radiator support comes off I’ll be finishing up the grinding and re-doing some of the crappier welds as I’ll be able to reach them easier.
DSC_2837

The beginning of the welding work

DSC_2788

This year’s project with the ’64 pickup is to get the rust fixed so I can get some paint on it. To that end, the front end was stripped down so I can start start in on the incredibly crusty mess.

DSC_2757The first target is the inner fenders. The front edge has a bracket on the underside from the factory that traps muck thrown up by the tires and always rusts out. The ones on this truck were previously “fixed” with super thin sheet metal pop-riveted on and covered in roofing tar. This worked so well the patches had rusted through as well.

DSC_2792I started in on the driver’s side by cutting out the rot until I reached good metal. I’m doing this with the radiator support still in place so I can use it as a guideline to make sure everything lines up. Once I have both sides done the rad support will come out so I can finish the patches & so I can fix the massive rot on the support.

DSC_2793 I set up my metal bender in a convenient location, then it was just the tedious process of cutting, bending & fitting patches. I am using 18ga steel for strength, so my flanging tool doesn’t make the flange deep enough to be flush. I’m not too worried as this area is not visible with the hood down.

DSC_2794One patch in…


DSC_2797Two patches in…


DSC_2809And patches 3-6 in.


DSC_2811 Then two more patches to replace the fender mounting flange.


It is far from perfect, and there is a lot of grinding still to do(as well as re-doing some of the uglier welds), but it seems solid. Once the radiator support is out I will need to add one more patch to the front edge of the raised portion, and drill out the various bolt holes.