Well crap

Saturday I found a small puddle of water on my bathroom floor where there shouldn’t have been any. Chasing the moisture turned into this:

The tub faucet has apparently been leaking, dripping past a terrible past tile installation(plywood instead of backerboard with no sealant at the edge), and running down into the wall.

That horizontal there is a sill beam. I won’t even know how bad it is until I get the tub out, which involves ripping out part of two other walls to free it.

SURPRISE! Major bathroom renovation with structural repairs. Oh, you were already renovating another room, replacing the driveline & suspension on your truck, and replacing badly rotted windows before the winter? Tough luck!

I spent this weekend powering through as much of the window & bedroom work as I could so I can clear the deck for gutting & rebuilding this bathroom. The truck however is likely to end up on indefinite hold until this is dealt with.

The latest in 1957 appliance technology!

I may be turning into Steve. I just picked up this mid-50s Hotpoint refridgerator for my kitchen.

My current fridge is a battered beige one that used to be my mom’s garage fridge before being gifted to me 3 years ago when I bought the house and needed a cheap fridge so I could move in. The compressor mount bushings are shot, so it clunks loudly when the compressor turns on or off, and the drip tray is missing, so it piddles on the floor.

My kitchen still has its 40s era cabinets, and I’ve been wanting to renovate it in a postwar style. So getting vintage appliances was always going to be part of that. I’ve been surfing craigslist for them, and lucked into this fridge cheap. I paid all of $200, though I did need to make a 4 hour round trip yesterday to pick it up.

This was quite the fridge in its day, with a brushed stainless panel on the front, and stainless and aluminum detailing throughout. The three shelves slide out to make it easier to get things off them, and there are separate cheese and butter compartments in the door.

Also it has Butter Control. Does your fridge have Butter Control? I don’t think so.

Right now it needs a deep cleaning, some minor paint/rust touch-ups from wear, one cracked plastic trim piece inside fixed, and I need to fiddle with the thermostat to get both the fridge & freezer portions to the right temp(it does cool, but getting the balance right will require some adjusting).

I’m super excited about this, and looking forward to getting it properly installed.

Trolling the future.

So when I tore out the trashed wood floor in my upstairs hallway(and the even more trashed linoleum under it), I found this hidden hole in the floor.

This was an old vent to allow heat from the kitchen to get upstairs before the house had steam radiators(the house was built before 1895). Now it is hidden by sheetrock in the kitchen, and was hidden by flooring in the hall.

While working on other renovation projects that needed finishing before replacing the hall floor I pondered what to do with this space. And finally, the perfect idea came to me.

Step 1) Buy teddy bear at Savers.

Step 2) Make the bear a sign.

Step 3) Put the bear and his sign in a bag.

Step 4) Stuff the bear in the weird hole in the floor.

Step 5) Install a quality hardwood floor in the hall, completely hiding the existence of the hole.

Step 6) Let some future person find the bear, and be deeply weirded out.

Given that the floor I pulled up was ~60 years old, there is good odds that I’m trolling someone who hasn’t even been born yet.

So I repainted my basement door this weekend…

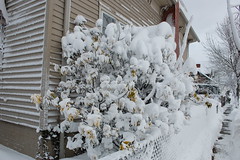
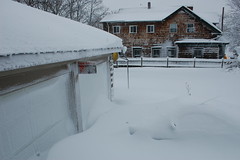
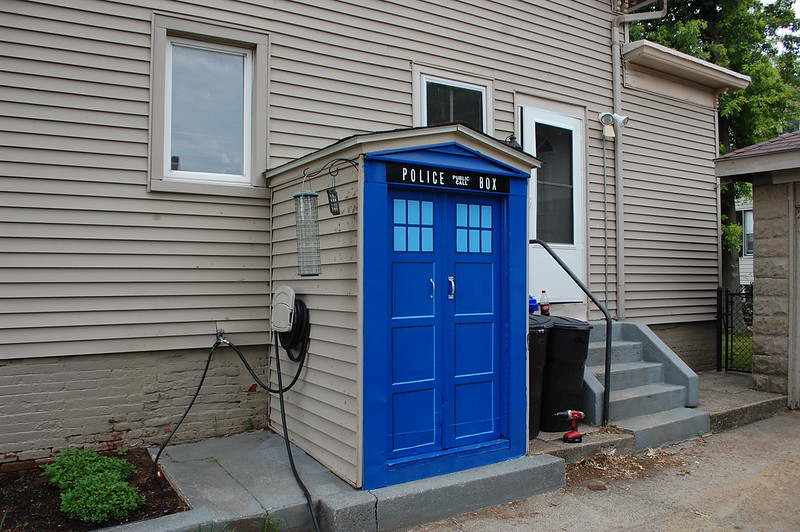
The basement is bigger on the inside…

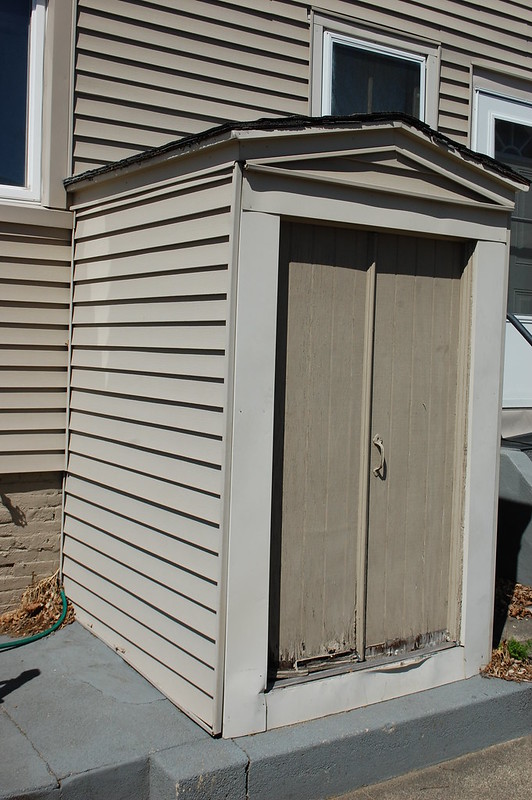
This was the basement door when I bought the house. Ugly, rotting and two shades of beige(I believe these colors are “spoiled putty” and “depressing temp cubicle”).

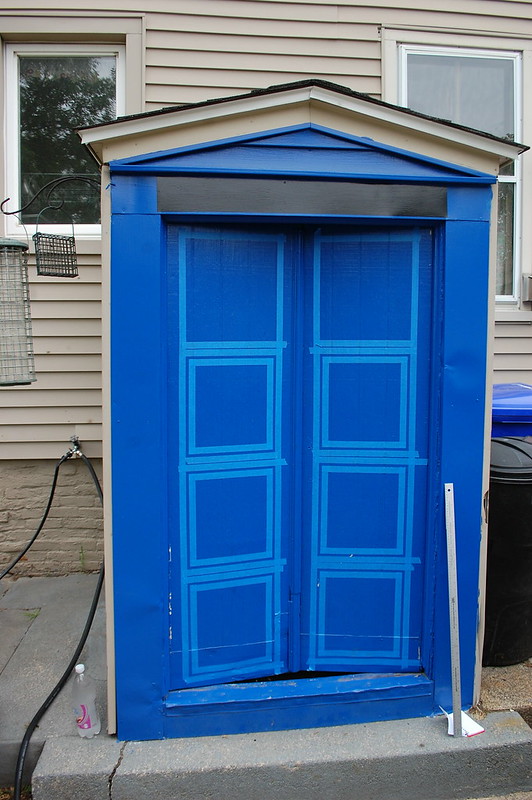
The long term plan is to rip this whole thing down and rebuild it to be less terrible, but that is really far down the priority list, so in the mean time it needed some sprucing up. First I patched the rotted door & damaged sill with some aluminum, then I scraped all the loose paint off the door. You can see the doors are faced in T1-11, which is about the worst surface for the project, it is both a rough surface and has vertical grooves ever 5-ish inches. But sometimes you have to work with what you have.

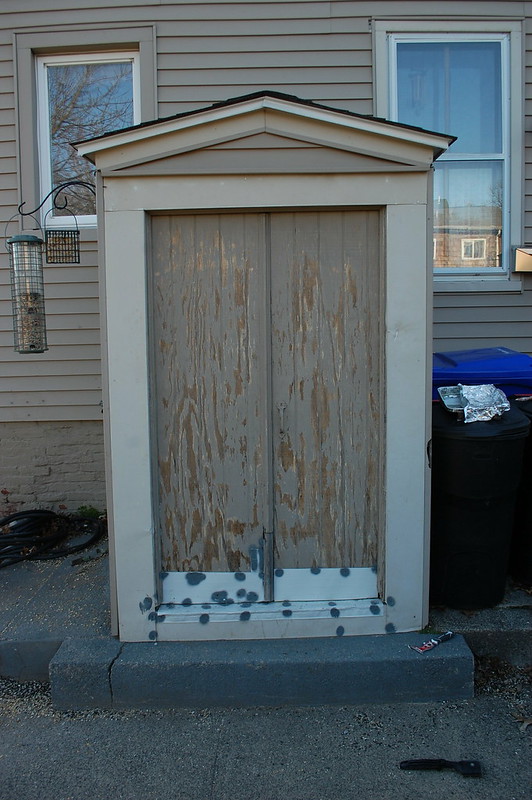
Next came a coat of primer, tinted to help make the blue brighter. This was already a massive improvement. This and the blue were both slathered on very thick to try and fill the tiny cracks & splits in the wood to both smooth the surface and improve the durability of the whole project.

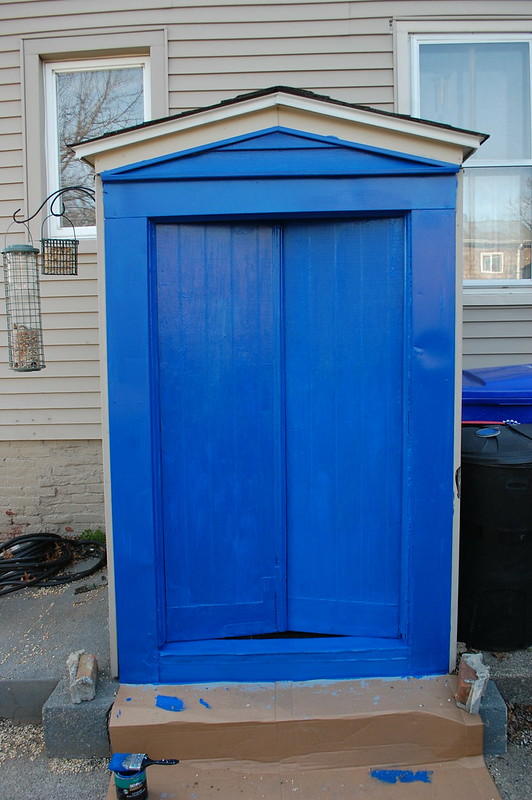
Then the blue, this was the first coat, it was too dark for pictures by the time the 2nd coat went on. The color is Behr “Sapphire Lace” from Home Depot, this or their “Jazz Blue” are good matches for Tardis blue.

Then came the masking. You can see I’ve already masked & painted the black for the “Police Box” sign at the top. This website was useful for doing the faux panels on the door.

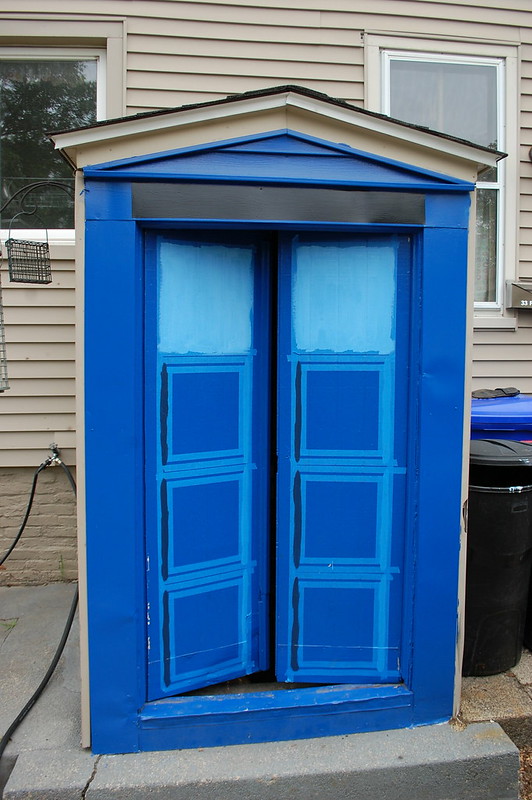
Then the painting started. I’d love to say we had some plan for how to get to the various colors, but honestly it was a lot of “eh, that looks about right.” We took some of the blue and in one cup added white to lighten it, and in another added black. We painted the vertical lines, then added more tint to shift the colors further and once the first paint had dried we masked the corners and painted the horizontals. The window ”glass” is the same colors as the lower horizontal on the panels.

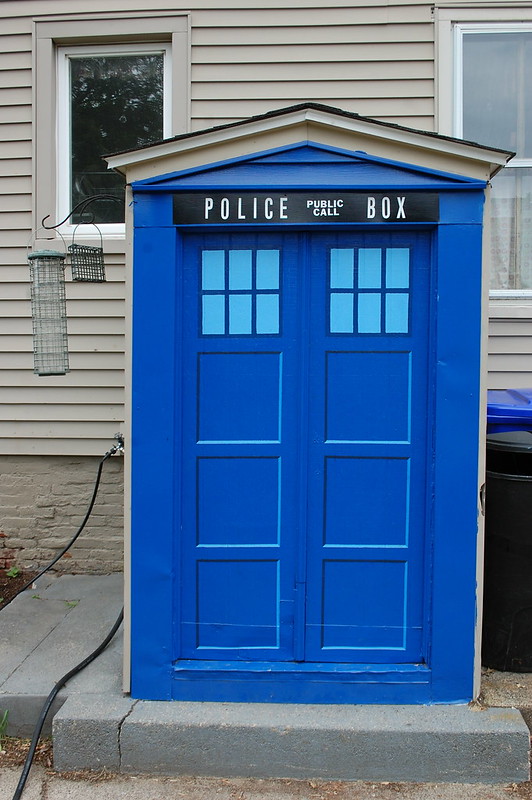
Painting completed. The window muntins were done slightly darker to make them stand out more. I ended up having to do a lot of touching up of paint bleeding under the tape due to the rough surface. I’m going to go back and edge the windows just to make them a bit crisper.

The sign lettering is simple stick-on vinyl lettering from Ace hardware. While the font isn’t perfect, it is pretty good, and the letters being slightly thick helps as this door is wider than the actual Tardis door.

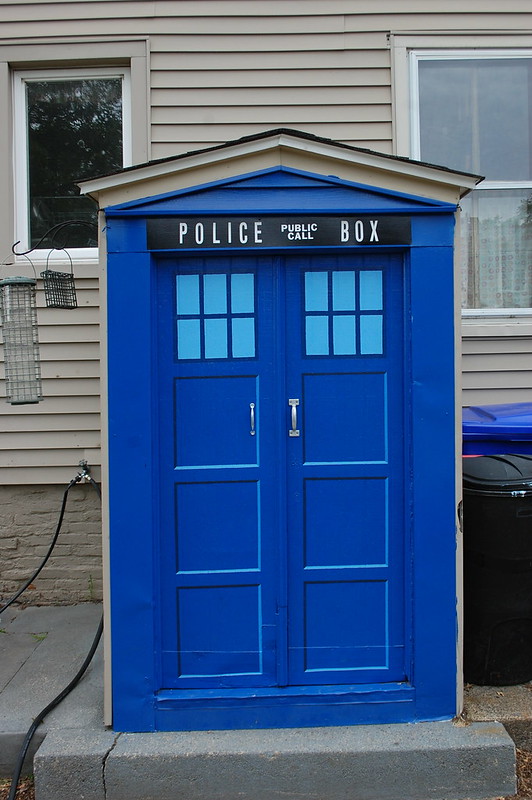
With handles installed. Aside from the window edging this is done for right now. I’d love to add the door sign but the only one I’ve found that looks like it would stand up to being outside is 16” tall, and I need one that is 12-13” tall.

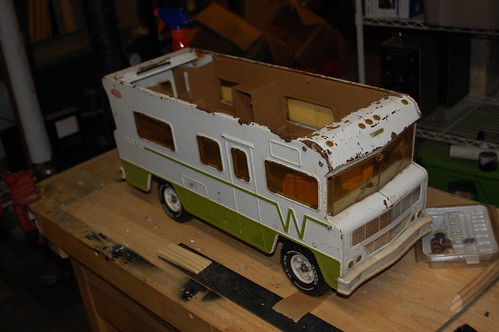
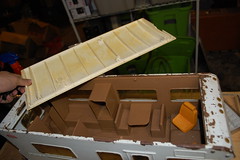
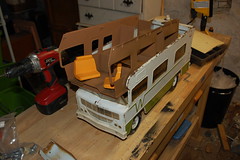
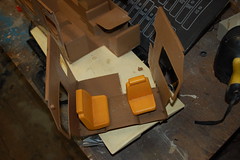
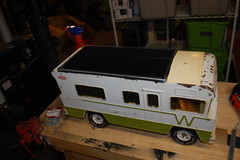
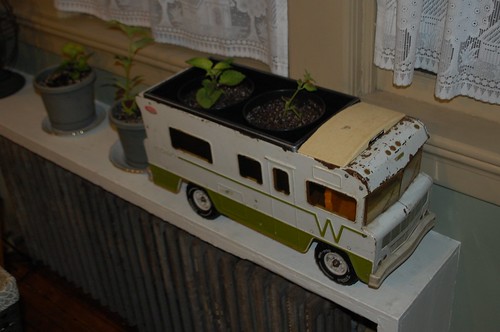
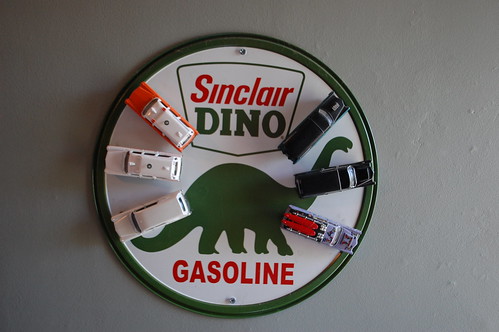
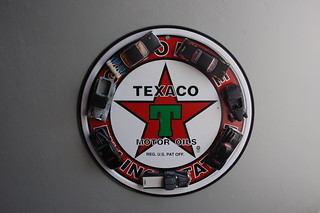
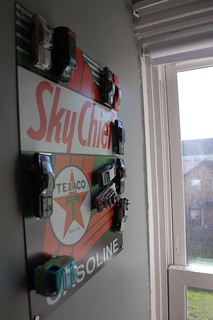
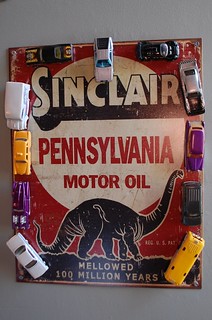
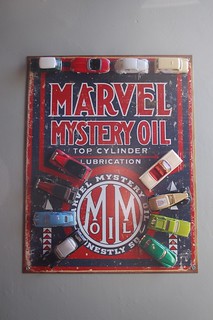
At this point you probably think I’m a huge Dr. Who fan, but actually I’m not. I like the show and enjoy it if I happen to catch it, but that is about it. I did this because a friend suggested it for that ugly door and it is exactly the sort of silly and whimsical project I love taking on. It is the same reason I make planters out of motorhomes, stick matchbox cars to my wall, and have teeth on my snowblower.

You made a what out of a what?

I bought this Tonka Winnebago at a flea market a few years ago for $5. I’d found out about these things after running across a thread where someone made it into an R/C car/tool box/tow vehicle for his other R/C cars. I really liked the battered look of this one, but didn’t know what to do with it, so it went into storage.

After moving it twice, I was looking at it again and decided I needed to either do something with it, or get rid of it. I’ve wanted to display it, but it takes up so much room, and the lid was broken. I then had a brain wave and decided to turn it into a planter for my g/f’s ever-increasing plant collection.


After measuring the roof opening, I was able to locate an appropriately sized planter, and went to work. With the header over the windshield unscrewed, the entire interior comes out easily. Without it, I understood why that guy had turned it into a toolbox, there is a ton of room inside.


Next I sawed off the front of the interior, I needed the back gone to fit the planter, but this way I still had the front seats. I’m keeping an eye out for some appropriate action figures to put here. I also measured & cut down the roof as well.


A sheet metal screw was added to hold the partial interior in place, and glue for the roof bit. Lastly I bent & cut the old roof prop-rod to serve as a brake for the wheels. It wedges into the spokes inside the wheels and keeps it from rolling around and dumping itself an a bunch of plants on the floor.


All that was left then was to drop the planter tub in place and call it done. I got lucky and found one at Home Depot that was exactly the right width. The planter isn’t secured in as I wanted it to be removable for watering or repotting. It should be ok supported on the edges, but if it looks like it is sagging when filled with dirt I’ll add some wood blocks inside the winne to support the bottom.

All told it was a quick fun little project that let me do something useful and fun with something that was otherwise sitting in storage collecting dust. Plus now our living room looks that extra bit sillier.


Whoops!

Had a bit of an accident this weekend.

I was continuing the epic job of rewiring the house and removing the ancient knob & tube wiring. Saturday found me in the 110+ degree unfinished attic digging through ancient insulation to find and trace the circuits for the second floor lights & plugs. I was balancing on the ceiling joist and a collection of old boards when I mis-stepped and put my foot through the ceiling of my bedroom.

Fortunately I caught myself before all of me went though the ceiling, but I was still left with a 10″ x 48″ hole with the plaster spalled off around it.

And where it all that plaster, lath, nails, dust, dirt and ancient insulation end up? Why on the bed & carpet of my bedroom of course.

As frustrating as it was to have just messed up like this, the worst parts was I still had a bunch of half-wired circuits and hacked up old wiring in the attic. So I had to ignore what I’d done and keep working up there so I’d have the lights and working plugs needed to be able to clean this up.

I don’t have photos, but as of now there are nice new lights in the upstairs bathroom & my bedroom, the one in the bathroom now even has a switch instead of a pull-cord.

The hole now has a piece of drywall screwed over it, and will eventually be re-plastered(when I feel like plastering over my head and wearing half of it).

Vertical Matchbox Storage

I have a small collection of 1/64th scale diecast cars. Matchbox, Hot Wheels, Johnny Lightnings and such. They are a random combination of stuff left over from my childhood, and neat stuff I have found since. Storing & displaying them has always been a bit of a pain as I didn’t want them cluttering up bureau or desk space, and I didn’t want to shell out for a storage cabinet as they were fun toys to me, not collector or art objects to be locked away behind glass.


I also love old enameled signs, though they are an expensive enough collectors item now that I only have one real one, the rest are reproductions, which are much more reasonable.

It occurred to me one day that I could combine both me matchbox storage problem and my love of old signs into one solution.


I purchased a few hundred neodymium magnets on ebay to give my idea a try.


I’ve experimented with a few different sorts of glue, only to find that simple hot glue works best, especially in that if it fails I can easily pull off the old glue and add new without having to worry about residue like with silicon or epoxy.


The easiest way to do this is to stick the magnet on a piece of steel, add a drop of glue, and press the car down onto it. The steel keeps the magnet from shifting until the glue has dried.


The magnets were supposed to be strong enough to hold a car with one magnet, but they tended to both let the car slide down the sign, and the car would rotate around so the heaviest bit pointed down. So I used two magnets per car, one at each end to keep it pointing however I wanted.


The end result is easily reconfigure-able and makes for a fun 3-d wall decoration.


It wouldn’t work well for a child’s room, as the magnets mean the cars no longer roll. However if decoration & display is the primary goal, it works really well.


Bringing light to dark places

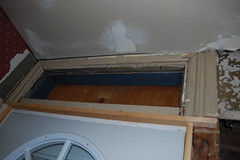
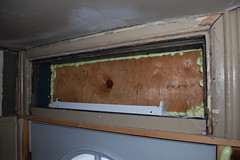
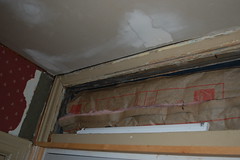
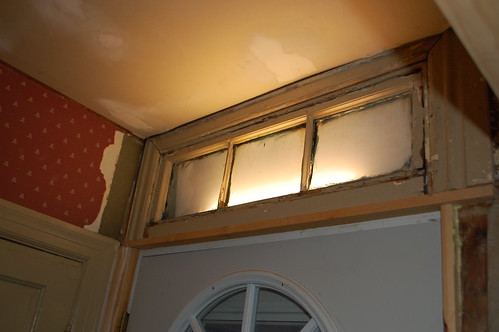
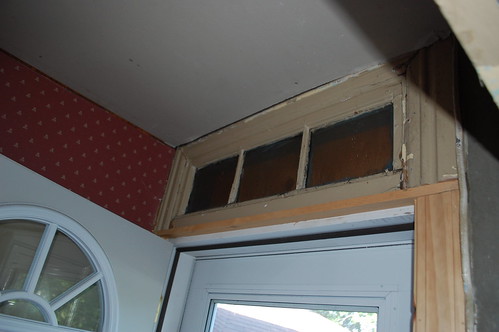
The mudroom in our house is tiny, about 3′ x 3′, and there isn’t a light in there. It isn’t bad now that I’ve opened up the doorway to the kitchen, but it is still dim, especially if you are trying to find something in the closet. I wanted more light in there, but did not want to add a ceiling fixture as the space is so tiny it seemed like anything would overwhelm the space.

In the mudroom however there is this old transom window. This used to be part of the back door, and was on the outside of the house where it let light into the mudroom. When the prior owners replaced the back door and sided the house, they covered the transom from the outside with plywood, but left it in place in the mudroom.  So I decided to use it to my advantage.

First I pried the transom window out. It had been painted dozens of times and the glass is falling out, but it is still essentially intact. I will be properly restoring it in the future when I start re-glazing all the windows in the house.


First thing was to seal the edges of the plywood with some spray foam, then I drilled a hole through the side of the transom and ran a wire to where I was rewiring the switch for the outside light. Then I installed a cheap fluorescent light in the transom opening. This light won’t be visible when the transom is in place, so I could use a cheap ($8 w/bulb!) fixture.

Then some insulation was added behind the light so there would be more than a layer of plywood keeping the heat in here. A piece of white Chloroplast was then added(visible in the next pic) to hide the insulation and help bounce the light out the transom.


The semi-final result is as below. Obviously there is still painting to be done, but you get the idea. The light itself is hidden, so all you can see is the glow shining out of the transom. It does an excellent job of lighting the mudroom, and makes use of an otherwise useless oddity of the house.


Feb 8th Blizzard, in pictures.

We, like all of New England, were hammered by a blizzard on the 8th. Snow was falling lightly when I left for work at 8am, and by the time I was coming home(early) at 2pm it was falling pretty fast. Not long after that the wind really picked up and more snow was going sideways than down. Power flickered a few times and finally cut out for good about 9:20pm on Friday. We sat around reading by lamplight, and staying under a blanket to keep warm.

At one point that evening I considered clearing the accumulated snow, however a quick look outside told me it would be a fools errand. The wind was whipping it around so much there would likely be no sign it had happened.

Instead we went to bed early and burrowed under a nice deep stack of blankets & comforters.


The next morning the wind and snow had subsided, but the power was still out. It was also 49deg in our living room.

We spent the day alternating between shoveling out and keeping warm with pans of boiling water on the stove(thank goodness we converted to gas before we moved in).

Electricity finally returned about 6pm on Saturday. We were without power for 21hours, which was pretty good compared with some people(a co-worker was without power or water for four days).


Most of the house looked like it has been sprayed with a snow gun.