Ongoing Beat(er) Box work.

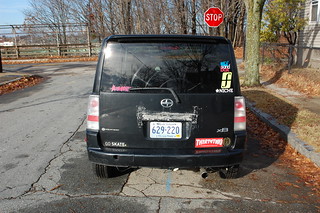
(pics/work is from mid-december)

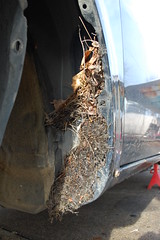
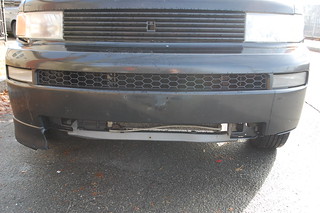
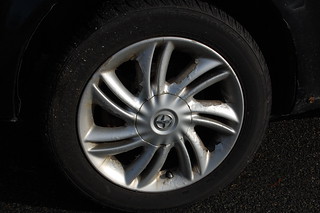
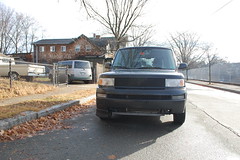
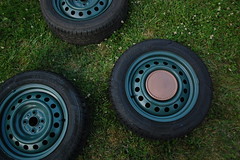
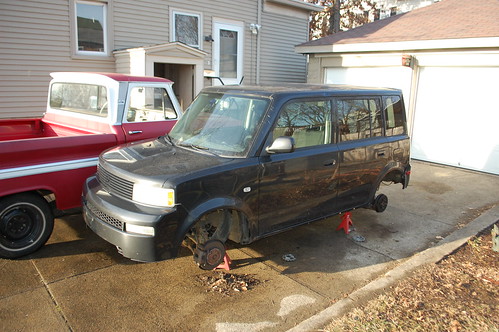
Pulling the wheels off, I started getting a more detailed look at the condition of the beater box. There was a lot of dirt & sand all over the undercarriage, when I pulled the fender liners, I found a large supply of compost stuck in the fender wells. Fortunately some quality time with the pressure washer returned the driver’s side to factory condition.


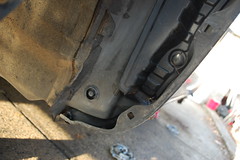
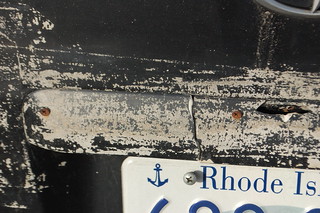
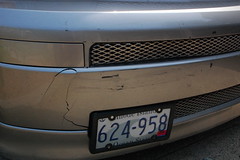
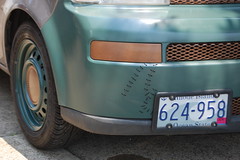
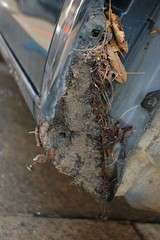
I wasn’t so lucky on the passenger side, there was a lot more dirt & mud on this side, and is was wet, which is a bad sign. The bottom corner of the fender was also bashed pretty good, exposing the metal, which had rusted. The pressure washer didn’t help, exposing surface rust on the inside panel.


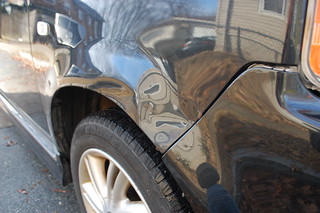
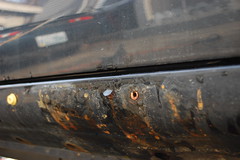
The rocker in this area  on the passenger side was similarly sketchy, with a lot of rust under the paint. At this point I started getting really nervous, as the car had been free of rust except for some surface rust prior to finding this. So I broken out the angle grinder and got started stripping the paint.


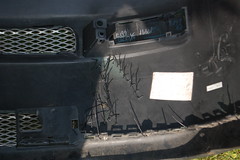
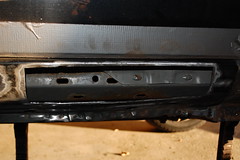
What I found wasn’t good at all. The rocker was barely there, with a big chunk being nothing but lacy rust. The fender bottom was also rotted out. The fender is a lot cause, given the other dents all over it, so I sealed the rust and will be looking for a good replacement fender. The rocker however would need significant rust repair.

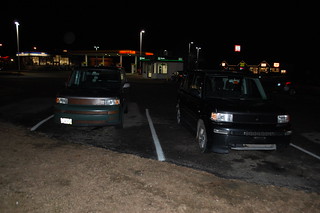
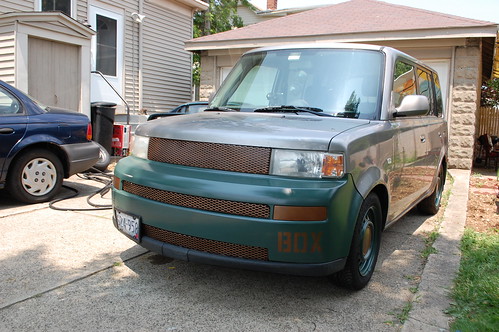
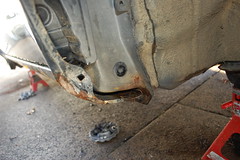
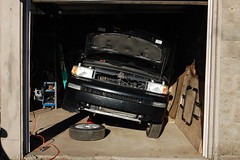
So the beater box was moved into the garage and propped up so I could get at the rocker. About this time the temperature plummeted, so the work ended up being stretched out over the next month a few hours at time on evenings when it was warm enough that by heater could keep up and the garage could get up into the 30s or 40s.

I was lucky in that the rust wasn’t in the torque boxes, so I started cutting out the rotted sections in preparation for welding in patches. I welded in a patch, only to have the edges blow out because the surrounding metal was thin & rusted. I kept cutting out more sections and welding in more patches and every time the edge would blow out again.

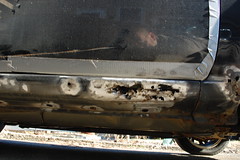
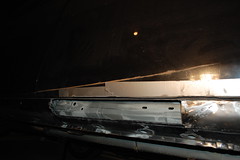
I finally gave up and cut the entire next section out of the rocker so I new I was back to good metal. This turned out to to be a very good idea, as the metal that looked solid was actually pretty perforated. I then welded up the new hole, which went far better with good metal to weld to.


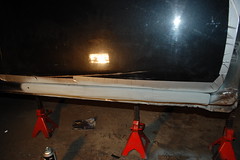
The patches went in ok, though they are a bit ugly due to my hap-hazard repairs. Fortunately they will be hidden once the rocker molding is back on.


Project Beat(er) Box, getting a better look.

In my first installment of the $1000 Scion xB, we’d driven driven 5 hours round trip and bought Project Beat(er) Box in the dark & rain. Saturday I got a chance to really get a good look at it. Fortunately the harsh light of day didn’t reveal and new horrors I wasn’t aware of.

The car was owned by a college kid in New Hampshire who was into skate & snow boarding, and you can definitely tell, especially from the back. In addition to a lot of sticker removal, the lower bumper lip is missing, fortunately I have a spare set in silver. But the big deal back here is the hatch handle.


These are prone to breaking, so the whole handle area is covered in fossilized duct tape residue from trying to keep it on. Their final fix was to badly epoxy it together before being re-attached with sheetrock screws randomly punched through the handle & hatch. The Goo-Gone is going to get a workout here before I do a better job of fixing the handle & finding a nicer way to re-attach it.

The front bumper is missing most of the lower lip, the lower grill and all the underbody plastic. I have a ratty lip that will work, and a spare grill, so that should be a simple fix. The underbody plastics will likely get replaced with some sheet chloroplast.


Both front fenders have some significant dents, I’m hoping I can pop most of this out so it’ll look better until I can do some serious bodywork.


The wheels are nasty, and are going to be a whole project in themselves. I will probably just wire-brush the loose paint and hit them with some silver to hold them until spring when I can do a proper job.


The driver’s rocker molding is torn off and the rocker is crunched near the front. Fortunately nearly all of this is hidden when the molding is on. It came wit the molding, but the mount holes are a mess. I may try and fix it, or I may just throw on the spares I have. The passenger side is partially loose, but looks to be a quick fix. There are a bunch of other minor dents & dings, and a lot of deep paint scratches. But no rot and no sign of any major accident damage.


Aside from a half-assed radio install & worn driver’s floor mat, the interior is in decent shape and only needs a good cleaning.

Next step will be getting it in the garage and getting dug into the brakes & drivetrain, but that will have to wait for temps above freezing.

Introducing project Beat(er) Box, the $1000 Scion xB

The ever-patient girlfriend recently decided she wanted to sell her two cars and get one all-around car. She likes my xB, so I decided to start looking there. I immediately lucked into a 2004 5-speed model about 2.5 hours away going for $1200. The ad said the check engine light was on and it needed some work, but since xBs book for around $4500 I figured it was worth a look.

Drove up through sleet & rain to find a somewhat ratty looking xB that a college kid was selling as he bought a newer Golf. Despite having 237K miles and having sat all summer, it started & ran fine. I pulled the code, which turned out to be an evap leak code that usually results from not tightening the gas cap all the way.

Took it for a test drive and other than slightly mushy brakes and noise from the front pads having rusted to the rotors it drove & handled fine. The body was rough, but didn’t have any real rust, and everything seemed to work as it should.

Talked him down to $1000, cleared the check engine light(hasn’t come back on), and headed home in a 2 xB convoy. The weather had shifted to combined rain & thick wet snow, but our new box trucked home without missing a beat.

The plan is to do some maintenance & clean it up some so she can start using it. Then over time make some aesthetic & mechanical improvements.

Box’s new look

Box recently got a makeover. He needed some attention, so I decided to have fun with him.

I was tired of the battered bumpers, which had suffered greatly through the last winter. They were cracked and scraped and the lower lips(which I never liked) were half-destroyed. In addition the custom aluminum grilles had started to corrode, and the wheel paint I’d done four years ago was getting worn & tired.


So off came the bumpers & wheels. I’d been buying up 90’s Jetta front lips as I found them at junkyard, with a plan to use them to make new lower bumper lips that were about half as low as the factory ones. I’d tried just removing the factory lips, but the bumpers looked unfinished, it was obvious there should be a lower lip on them.

First up was the wheels. I scuffed them and painted them with some Rustoleum paint. I’d been aiming for a dark hunter green, however the color turned out to be more of a military olive drab. I wasn’t sure at first, but the color has grown on me. The hubcaps got a coat of aged copper.


For the bumpers I sanded out the worst of the scratches & chips, and painted them the same green. As the color is a satin rather than a gloss I wasn’t worried about perfection(plus there is no way these bumpers would ever look perfect).


The Jetta lips were obviously not designed to fit  the xB bumpers, so I spent a lot of time cutting & trimming them to match. They are not a perfect match shape wise, but look good in general, and have the right shape to give the bumpers the look I wanted. I also fixed the cracks in the bumper using zip-ties to stitch it back together. I could have used epoxy and made the repair virtually invisible, but this amused me much more.

All total a hundred or so zip-ties were used to put it all back together. The grilles were painted the same aged copper, along with the fog-light covers and the tow hook cover on the rear bumper. Then everything was re-assembled.

I also removed the side skirts, and with a bit of stenciling the project was done.


All together it came out exactly as I’d hoped. I was able to fix several issues that were making box look beat-up, fixed the lips that always bugged me, and made a major change in his overall aesthetic. So I’m calling this a win.

The history of the Box, part 1

I’ve mentioned Box in passing here before, but I figured it was a good time to introduce him properly.

Box is a 2004 Scion xB I bought back in November of 2007. I had gotten bored with the ’96 Subaru Outback I had at the time and sold it. I was planning to replace it with something around $3K that got excellent gas mileage. I thought playing with hypermiling would be interesting and I was sharing a house with friends who owned a minivan & pickup so a wagon seemed less vital.


After looking at a variety of Civic hatchbacks & Neons without any luck, I found an ad for a used car lot selling an xB for $8500, a pretty good price for the car. My girlfriend and I drove about three hours out to see it on a whim. Despite having 92K miles on it, it drove like a brand new car, had a surprising amount of pep for a 108hp motor and had a flat out ridiculous amount of space inside.

The inside smelled a bit of cigar smoke though, and there was a small scrape on the passenger doors. On a whim I offered the guy $6500. When he asked how I’d gotten to that figure I told him it was what I felt like paying for the car. About then we got back from the test drive, at which point he went in the office and dug out a piece of paper and handed it to me, telling me he would sell it to me for that figure.

It was the invoice from the auction he’d bought it at, for $6828.

Sold!

After a desperate drive to the nearest branch of my bank 30 miles away, I was the proud owner of a 2004 Scion xB, for $6823, because his secretary wrote the invoice wrong, and I didn’t catch it until we’d left. I drove home waffling wildly between maniacal glee and absolute “What have I done?!?” terror. The picture to the right is actually the first one I took, right after I pulled in the driveway.

Next part; I can’t leave well enough alone, some of the (many) modifications I’ve made.