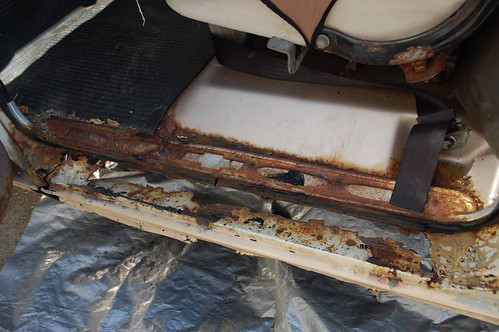
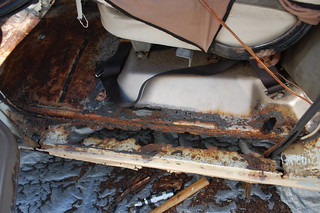
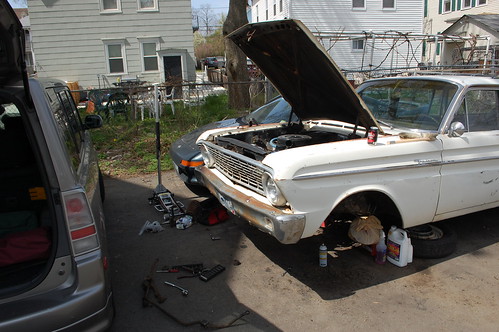
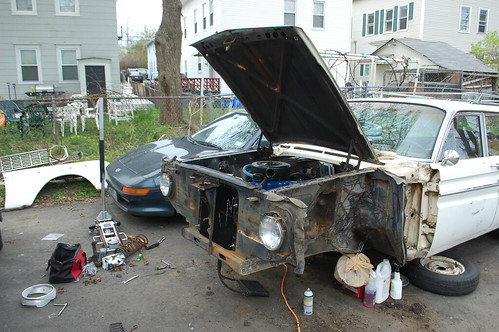
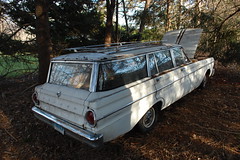
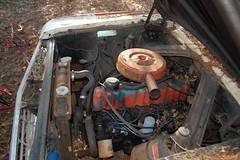
Ongoing Beat(er) Box work.

(pics/work is from mid-december)

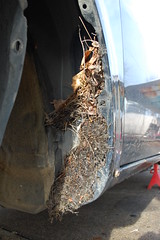
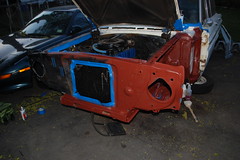
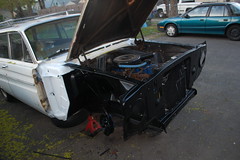
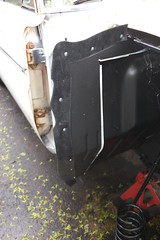
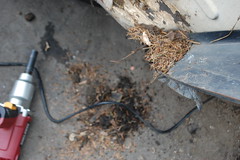
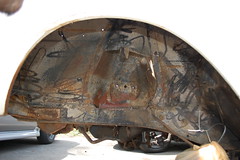
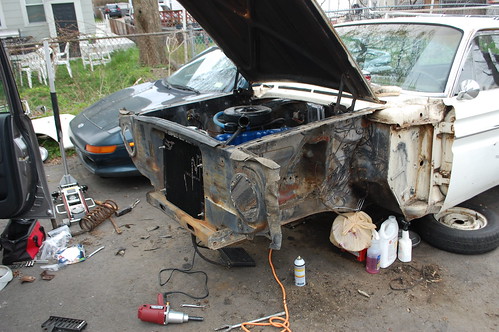
Pulling the wheels off, I started getting a more detailed look at the condition of the beater box. There was a lot of dirt & sand all over the undercarriage, when I pulled the fender liners, I found a large supply of compost stuck in the fender wells. Fortunately some quality time with the pressure washer returned the driver’s side to factory condition.
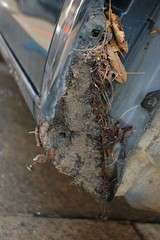


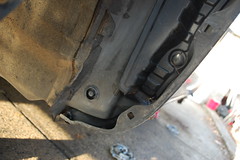
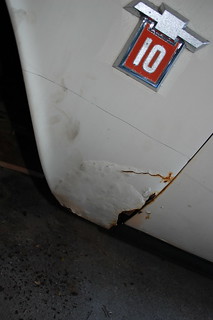
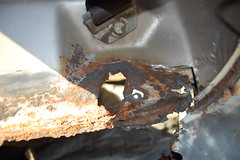
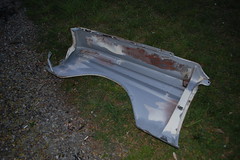
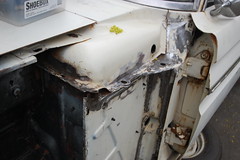
I wasn’t so lucky on the passenger side, there was a lot more dirt & mud on this side, and is was wet, which is a bad sign. The bottom corner of the fender was also bashed pretty good, exposing the metal, which had rusted. The pressure washer didn’t help, exposing surface rust on the inside panel.
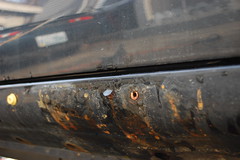


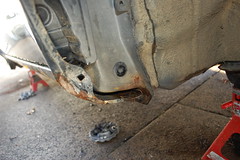
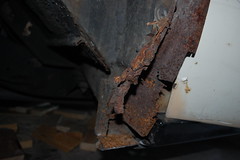
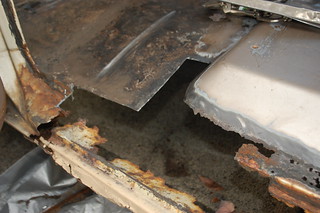
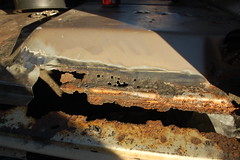
The rocker in this area  on the passenger side was similarly sketchy, with a lot of rust under the paint. At this point I started getting really nervous, as the car had been free of rust except for some surface rust prior to finding this. So I broken out the angle grinder and got started stripping the paint.
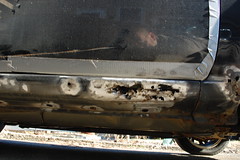
 

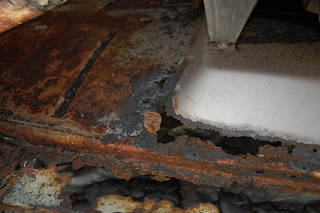
What I found wasn’t good at all. The rocker was barely there, with a big chunk being nothing but lacy rust. The fender bottom was also rotted out. The fender is a lot cause, given the other dents all over it, so I sealed the rust and will be looking for a good replacement fender. The rocker however would need significant rust repair.
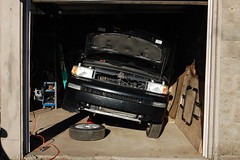
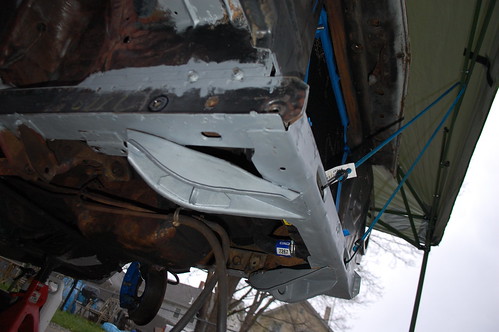
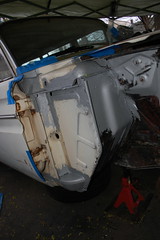
So the beater box was moved into the garage and propped up so I could get at the rocker. About this time the temperature plummeted, so the work ended up being stretched out over the next month a few hours at time on evenings when it was warm enough that by heater could keep up and the garage could get up into the 30s or 40s.
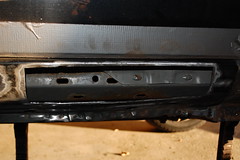
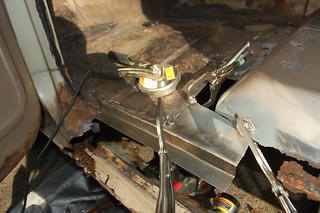
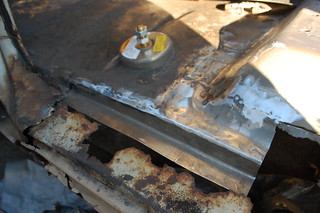
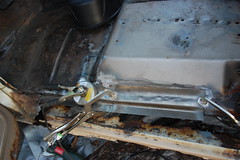
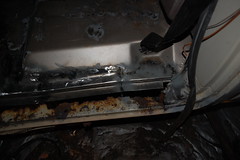
I was lucky in that the rust wasn’t in the torque boxes, so I started cutting out the rotted sections in preparation for welding in patches. I welded in a patch, only to have the edges blow out because the surrounding metal was thin & rusted. I kept cutting out more sections and welding in more patches and every time the edge would blow out again.
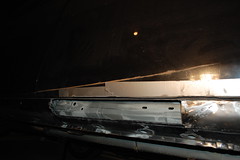
I finally gave up and cut the entire next section out of the rocker so I new I was back to good metal. This turned out to to be a very good idea, as the metal that looked solid was actually pretty perforated. I then welded up the new hole, which went far better with good metal to weld to.
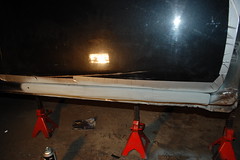
 

The patches went in ok, though they are a bit ugly due to my hap-hazard repairs. Fortunately they will be hidden once the rocker molding is back on.

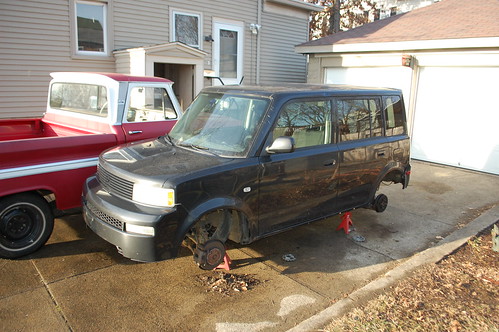
 

Fender work

I finally decided to get back to doing some rust work on the truck. I haven’t yet figured out how to fabricate the inner rocker, so I decided to work on the rot in the fenders first.

I cut the bottom of the fender off, only to discover the inner bracket was rotted out and a prior owner had done some hack repair work. All the original bracketry for attaching the fender was cut out and not replaced properly The fender was actually welded to the cab.


Now I have an entirely new problem to deal with. I have to decide whether to buy all the patch panels to fix the cab mounts & fender bracket which would cost about $250. The other option is to fab it all from scratch, or only buy part and fab the rest. I’m going to have to do more thinking on this.


The start of rocker repair on the truck

When I bought the ’64 Chevy I knew the worst rot on the truck was in the driver’s rocker area, the whole area was rotted badly enough you couldn’t step there without the whole thing crunching and feeling like it would collapse at any second.

Part of my plan with this truck is to fabricate metal repairs wherever possible, so I could practice metal fabrication, and save money. With the rocker I decided to buy a replacement outer rocker, but fabricate the inner stuff myself.


I started by pulling off the sill plate(which was a ruin in and of itself), and made a pass with my Harbor Freight sandblaster to find all the rust holes.


I was left with very little good metal. It quickly became clear that the decorative sill plate had become structural, and was stronger than the remaining rocker.


So first I cut back to solid metal, getting rid of all the marginal stuff so I knew I had a solid base to start from.


Then came the first of four patches. I formed the right angle bends with the help of a brake, but the rest was hammer formed using whatever around the garage had the shape I needed.


Then it(and the second filler patch) was welded in and ground smooth.

.


Then the second patch, before and after.


And the third. This patch only got tack welded in before I ran out of light.


Then between Hurricane Sandy & selling the wagon I haven’t gotten back to it. But the floor is already noticeably more solid with just this much completed.

Project Creep 3, paint and more paint!

If you aren’t sick of seeing parts of a Falcon with paint on them, you will be soon, almost as sick as I was of painting them.

After two coats of Masterseries it was time for primer. I’m using various Rustoleum paints for this, as they are cheap and pretty durable. It may not be professional level restoration quality, but since that isn’t what this car is, it suits me just fine. So several cans of Rusty Metal Primer later and everything was consistently dark orange.

Since there was a lot of waiting for paint to dry, I was jumping somewhat randomly between lots of different parts of the car. So for instance I might find myself painting Masterseries on the inside of the fenders, then putting a coat of primer on front suspension parts. I had an elaborate (and likely baffling to anyone else) system as to where things got placed on the driveway so that I could keep parts from the left & right sides of the car apart so I didn’t cross anything important up.

One thing I learned on a previous project, and utterly failed to remember to photograph here was how I kept all the nuts & bolts organized. as things came off the car, all the relevant hardware would go into a simple ziploc style sandwich bag, and have “Right Fender” or whatever written on it. Then later I’d sort & count what was in that bag and add a list of the contents. I had gotten a Harbor Freight Vibrator Tumbler(which is less exciting than it sounds) for my birthday, so all the hardware got a run through that, which while it didn’t come out looking brand new, definitely cleaned it up significantly. Then it all got a quick coat of spray paint, just to keep it from rusting right back up and making my new paint look a mess.

After primer came the top coat. Everything got two coats of semi-gloss black, then any part that was going to be inside the wheelwell got a coat of truck bed liner to help protect it from stuff kicked up by the tires. I continued on painting the various suspension bits so that everything that was going back on the car would look like new.

One thing I needed to replace was the rubber seal that went between the inner fender & the fender itself to keep the tire from flinging stuff where it would collect and help form more rust. The originals were dry & cracked and basically fell apart when I removed them. I had planned to find some other material to make replacements out of, make patterns and cut new ones. I was even going to do a separate blog post about it. Then I discovered a full set of reproduction pieces was all of $24, so I bought those. Sorry. I ended up using sheet metal screws with extra-wide heads to install them. They were originally stapled on from the factory, but I don’t own any tools capable of punching a staple through 18 ga sheet metal.

Next up, stuff goes back together.

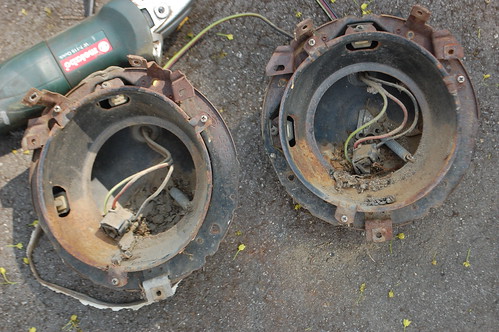
Headlight Bucket Restoration

As I missed a few updates, I figured I’d give you some short bonus entries to make up for it. So here is the first, the restoration of the headlamp buckets.

Each of these buckets were covered in surface rust, full of dirt and each had it’s own long empty hornets’ nest.

First everything had to come apart. Everything on these was intact, and like the car had no rot. The wiring & connectors were all still good and the wiring was still flexible.


Everything got a very thorough wire brushing to remove the surface rust, then two coats of primer, followed by two coats of semi-gloss black.

The back of the bucket got a coat of truck bed liner like the inner fender, then the wiring was scrubbed clean and everything was re-installed.


Little side projects like this are really great when working on a larger overall project, they give a sense of accomplishment and completion that helps keep the momentum going when the larger project is taking longer than expected.

Project Creep part 2, in which a rotted mess fails to materialize

In my last post (two weeks ago, sorry about that) I’d started out replacing the front suspension ,and ended up stripping the front end completely off. The new plan was to check over, derust & repaint all the inner structure, while leaving the exterior looking just as ratty as before. I’m sure some of you are wondering why I don’t just paint over all the worn out paint & surface rust, but I both rather like the patina on the car, and would prefer consistently ratty to a mismatch of ratty & repainted.

First up was assessing what I found. And I was surprised to find just how good everything was. There was surface rust in several places, like the edges of the cowl, the torque boxes, the bottoms of the fenders & inner fenders & under the battery tray. However there was absolutely zero rot anywhere. Not one rot hole to be found. When I pulled apart the “better” of the two ’62 Comets I had, it had been a very different story.

This was all the more surprising considering the piles of pine needles & mulch hidden at the bottom of both fenders and packed into the cowl drains. I can only guess that that stuff dated from the last few years(and in particular the eight months the car sat in the woods before I bought it), rather than the previous decades it sat in a barn. So the moist plant matter didn’t have time to really encourage rot.

The next step (after I spent 45 minutes with a pressure washer removing a garden’s worth of plant debris from inside the cowl) Was to start grinding down all of the rust in preparation for paint. It may not look it in shots like this, but every spot of rust has been diligently gone over with a wire wheel and/or angle grinder. Ford used a rust-colored primer though, so exposing that ended up making the car look more rusty, not less.

I also ground off what I initially though was a layer of undercoating, but eventually realized was actually a sort of clay-heavy dirt that was caked onto every surface of the wheelwell and had been there so long it had taken on the appearance of being part of the original car. I eventually was able to get everything looking as shiny new as I could, and was able to start putting paint on, instead of grinding it off.

Lets hear it for Masterseries paint, This is my absolute favorite rust-sealing paint, and I’ve been through at least 3-4 quarts so far on various projects (and have two more I just bought sitting in the garage for later on this car). I put a nice thorough coat onto everywhere I’d found rust, making sure to get it into and gaps or cracks where rust might fester. As much as I wanted to just coat everything, I had to prioritize as I was low at the time and didn’t have time to wait for more to be delivered. So stuff ended up looking a bit odd, with seemingly random silver painted bits over the worn old paint. And, of course, because the universe likes to mess with me, it started to drizzle the moment I was done paints, necessitating an emergency solution.

Next up, painting and more painting.

Project creep, part one

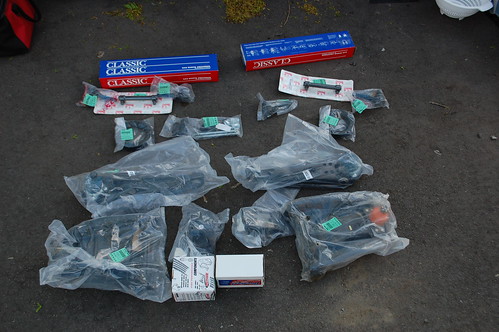
The plan was simple, replace the worn out front suspension with all new parts so that the steering wheel would feel more like it had a say in the direction the wagon went. To that end I ordered a complete rebuild kit that had nearly every piece I needed, and on Saturday started pulling the old parts off.

All things considered it came apart surprisingly easily. The tie rods were stuck in place, but after some enthusiastic hammering they popped loose. Compared to other times I did this job this was a cakewalk, no stripped nuts, no rusted in place bolts. Everything came apart with simple hand tools. I spent about 1.5 hours on saturday getting the driver’s side completely removed, and got a good start on the passenger side before having to clean up for a friend’s party.

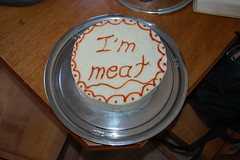
It was an OMGWTFBBQ!!1!, where you’re supposed to bring weird or disturbing food. We brought a meat cake. Two layers of pork & beef meatloaf frosted with mashed potatoes and iced with ketchup.

Yeah, we’re weird.


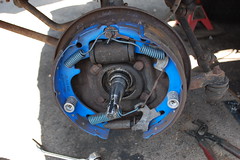
Sunday found me back out working on the wagon. One great surprise during all of this was the front brakes. The guy I bought the wagon off of told me he didn’t think his mechanic had touched the brakes, so despite them working well I was already budgeting for a complete brake overhaul. So imagine my surprise when I pulled the drums and found front brakes that looked like brand new.

Everything in here looks like new, the pads have tons of meat on them, and the rubber parts are in great condition. Even if the rest of the system is junk this is $100+ in savings right here. Regardless they were removed for now, and eventually the suspension was stripped down to the bare spindles. The spindles, strut rods & springs are the only parts I am re-using, so they will get cleaned up and repainted before going back on.
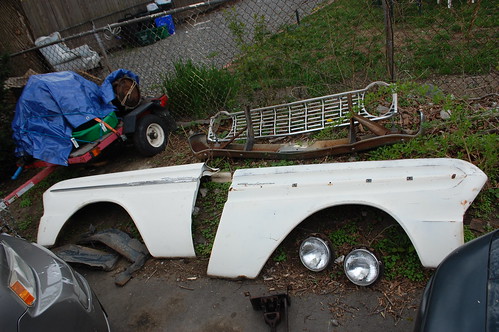
the squiggles are from a quick pressure-washing before I started, turns out pressure washers remove old undercoating

Eventually I was left with two empty wheel wells. I had planned to paint the mounting points for the suspension before re-assembly so I wouldn’t have to take it back apart to paint those later. Looking at the space in the wheelwell I decided it would make even more sense to clean up and paint the entires wheelwell area while the suspension was out of the way. I started cleaning in here, then realized that if I was going to repaint in here, it would be even easier if I cold reach everything.

And so the project creep begins.

Going…

Going…

Gone.

In the next post I start in on the rust cleanup and repainting.

Rust and the delusional seller.

(This is a car shopping post from before I bought the wagon)

I love living in new england for many reasons. The changing seasons, the ability to visit multiple states win a relatively short drive, the incredible amounts of history. But there is definitely a masochistic streak to being a car lover here. Anything you drive does its level best to rot out from under you. And classic cars shopping doesn’t involve the question “does it have rust?” but rather “How much rust does it have?

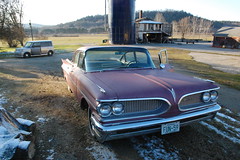
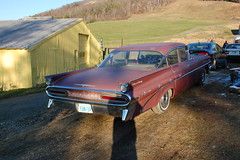
The honest answer on this car would have been “Way too much.” However as with far too many cars I’ve looked at, the sellers either lie to you in hopes you won’t catch them, or are apparently looking at a completely different car when they answer my questions than the one they show me when I get there. When I talked to the seller of this 1959 Pontiac Star Chief he made a big point to tell me that the car had been repainted two owners back, and his answer to the eternal rust question was that the driver’s floor could use some work and there was a spot behind the rear window.

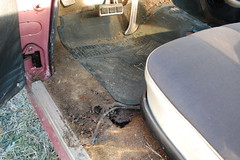
With that answer I made plans for the three hour each-way trip to see it, visions of double fins dancing in my head. Upon arrival I was greeted with a very faded and cracked paint job that was starting to peel. Not a big deal I thought, I’d want to change the color anyway. So I peeled back the trunk mat to look at the trunk floor, and saw a big line of rot. Other side of the mat, more rot. Peeled up the front of the mat to find the trunk floor and the passenger wheel well were separated by a jagged gulf big enough to lob a ferret through. From there it only got worse. The rear floorboards were rotted out, the front floorboard were so bad the passenger floor brace had rusted off and was laying loose on top of the muffler. It became a sick sort of game.

Cowl? Rotted.

Radiator support? Rotted.

Rockers? Rotted.

Fenders? Rotted, then bondoed.

Doors? Rotted.

Rear decklid? Rotted.

Roof pillars? Rotted.

He wanted $3000 for what was an engine powering a decent set of seats, and some good glass and trim loosely connected by some very bad metal. I didn’t even bother to have him start it. I just snapped the pictures here and headed back home. It makes me sad to see a car in such poor shape, but it makes me intensely frustrated to have someone tell me a car is one thing, and then show up to discover it is something completely different. The same question always pops into my head, the question I have, thus far, been too polite to ask. “Did you honestly think I would be more likely to buy the car because you bullshitted me? Do you think finding out I’ve been lied to was going to make me more likely to give you my money?” One of these days  the lies will be a little too egregious and I will not be able to resist, I promise to report back whatever response I get.

Got the wagon home & significantly less gross

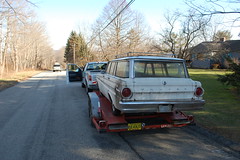
I brought the wagon home this past weekend. Amazingly with a new battery & some gas it fired up and drove out ofthe yard it was sitting in Brakes/transmission/engine all seem to work (I’m still going to go through them all). The engine runs rough and does seem to have some kind of valve issue, but it runs better than I was lead to believe

Once we had it on the trailer & strapped down I used some waterproofing tape(butyl back aluminum) to seal the roof holes for now to at least stop moisture getting in. Then it was back home with one stop to fill the tank on the wagon and another to spend $10 at a car wash powerwashing as much of the grime of the exterior & engine bay as possible.

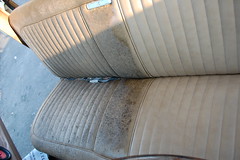
Once home and unloaded we started cleaning it up. The seats & door cards had a massive amount of black mold on them, but bleach and scrubbing did amazing things for the seats as you can see in the half-done shot to the right. The backs of the door cards have rotted cardboard, so a winter project is going to be to try and peel off the vinyl and glue it to new backers.

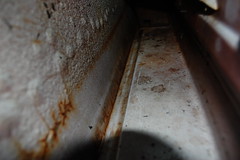
The insides of the door were amazingly rust free, and will only need some minor cleanup & a few coats of Materseries to keep them looking good. The car has an old “Rusty” rustproofing sticker so maybe that is why the doors survived so well. I found some small rust pinholes in the cargo floor & spare tire well, but they should be pretty simple to weld in patches.

After bleaching & scrubbing the seats look quite presentable and I am really happy with them. I tossed the armrests as they were all some combination of stained, moldy & torn; I do have a decent set of red ones that will work for now. Once I get a new filter for my shop vac the interior will get a vacuuming, and I’ll start pulling out the old rubber mat in the back footwell. Unfortunately the power tailgate seems to be DOA, and it would require a bunch of dis-assembly to diagnose so I’m probably going to hold off on dealing with it until the spring.

In addition to the cleaning I got some small jobs done on the car(new exhaust donut gasket, new radiator cap, running some seafoam through the motor, seal tears/cracks in old 1/4 glass & windshield gaskets with RTV). I’m starting to make lists of what the car needs so I can better plan my strategy. Amazingly it runs and drives well enough that I’ve taken it on a few short drives. The next few weeks are going to be skimpy on free time to work on the wagon, but I have a backlog of car shopping posts to finish anyway.

One has been chosen.

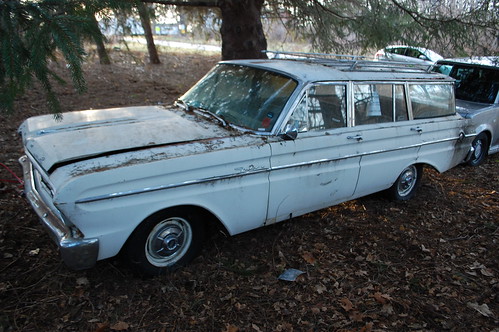
I had absolutely no expectation of finding something this (relatively) quickly, and this car is the opposite of nearly everything I’d been looking for. But love is blind, and sometimes bloody stupid. Regardless I am now the (somewhat nervous) owner of this 1964 Ford Falcon wagon.

It is the midrange model and has a few options(automatic transmission, power tailgate window) but is still pretty spartan. The exterior still has the original white paint and the tan seats & door panels are there and decent, though the carpeting & headliner are missing. This car has been sitting under a pine tree for about eight months due to a bad valve. The battery is flat and it won’t start and the tree has left it dirty outside & moldy inside.
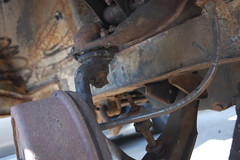
According to the previous owner he bought it from Iowa via ebay in 2009 and had a lot of work done(tires/radiator/starter/exhaust/new front floors) to make it a decent driver and used it regularly until “a valve went bad”. However he knows nothing about engines and couldn’t explain it any further. I’m going on the assumption the head is bad on the off chance it means I’ll be pleasantly surprised. My plan is to go out where it is still sitting with a battery & fresh gas to see if i can get it to run enough to at least make loading it on a trailer easier.

Besides the engine the single biggest problem with the car is the roof. The edge of the roof is badly rusted/rotted from above the back doors all the way to the tailgate. This is apparently common on these wagons as condensation forms on the inside of the roof and collects in the edges rotting them out from the inside. I’m going to just seal the holes for right now, and deal with proper repairs in the spring. I’ll probably weld in patches for now and depending on how that ends up looking probably look for a good roof to splice in down the line.

For now though my plan with this car is to make it a reliable beater and just enjoy it without trying to make it perfect. An old wagon with a chrome roof rack and faded original paint is undeniably cool, and should make for a great project.

Of course updates will be posted her as things happen with the wagon, I will also still be posting car shopping entries from the backlog of vehicles I looked at before I bought this.