Experiments in Plastic welding

The spare tire cover on the wagon was a shattered mess when I got the car, with multiple cracks making it a floppy useless mess. There was even signs that someone else had tried to fix it with epoxy at some point in the past. The only other one I could fine on ebay was $50 and had cracks of its own. So I figured this was a perfect time to try something I’d heard about, plastic welding. The idea is to heat & fuse the plastic together, mixing in a bit of extra plastic as filler, the same way you would use filler rod in regular torch welding. Since the cover was garbage otherwise, I figured I had nothing to lose.
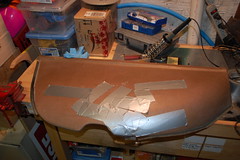
The first thing I did was duct tape the various cracks together. I couldn’t get them to sit tightly closed, but it at least kept the pieces in place enough that the welds wouldn’t pull apart as they cooled. They sell specialized tools for plastic welding, but the tutorials I found online said it could also be done with a soldering iron, which I do have.
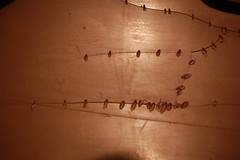
I started out by dragging the tip of the iron across the cracks, sort of tack-welding them together. This was enough to keep the pieces together. Once I had stitched all the various cracks closed like this, it was time for the real “welding.” I shaved a thin strip off the bottom of the cover where it wouldn’t be noticed to use as filler for the welds.

If you haven’t done any welding, the filler is(in over simplified terms) used to provide enough material to allow the two piece of whatever you are welding together to fuse together. Basically what you do is heat of the material(with the soldering iron in this case), then add the filler and the material & filler flow together and form one solid piece.

In this case I was using the point of the soldering iron the form a V  furrow along the crack, and adding filler to the tip of the iron so it would flow into the V welding the two halves together.
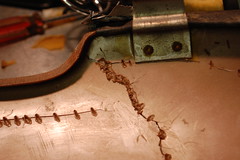
In reality it didn’t go anything like that. It was really clear that the soldering iron is not designed for this sort of thing. What I ended up with in most cases was a line of melted plastic that looked like old chewing gum. However it was holding the piece together pretty well. Even bending the cracks didn’t pull apart.
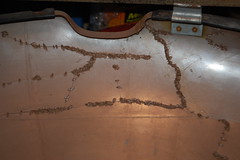
 

However between the time it took and the fumes making me feel a bit sick I decided I wasn’t going to try and weld every single crack. Instead I welded the major cracks, and spot welded any junctions of cracks or ends of cracks to help hold everything together. In the case of the biggest crack, the one that had been epoxied, the edges were so ragged the crack was still looked open from the outside, so I filled it in with plastic from the outside, it didn’t hide it, but it at least made it less obvious.

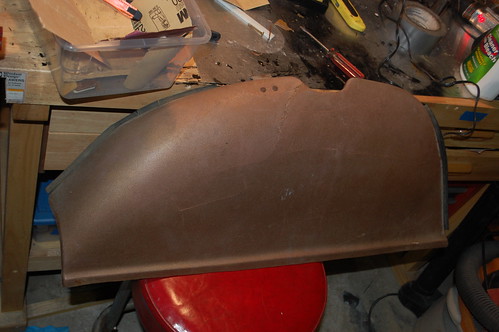
.All told, it came out pretty well. The cracks are still visible as there is no way to get it perfect and the patterning in the plastic make it impossible to fill & sand it smooth. However it is now solid and functional, and when/if I redo the interior I’ll cover it in the same vinyl as the interior.

Hot stuff, in the good, then bad way

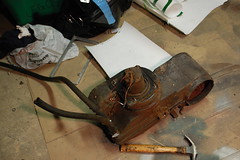
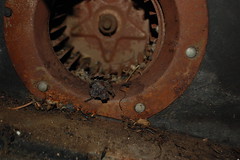
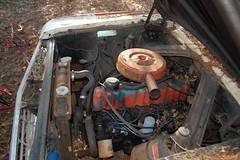
About two weeks ago I decided to finally use the parts I ordered from Falconparts to get the heat working in the wagon. The heating system was completely non-functional all playing with the levers would get you is a faint smell of mouse pee. After unhooking the heater hoses & unbolting the heater box I crawled under the dash to disconnect it. Clearly I’d been lucky with the faint wiffs of pee, the heater box was both full of, and topped with mouse nests.

After pulling the heater box out and dragging it downstairs I cracked it open. Lets just says you should be incredibly grateful this blog is not in Smell-O-Vision or you’d be desperately deleting these pictures.  The picture to the right is after I pulled out the worst of the still-damp mouse nests. I pulled everything apart & vacuumed up what I could, then carried everything upstairs.

I then spent the next hour bent over the tub scrubbing the ever loving hell out of every square inch of all the pieces. I scrubbed so hard the paint came off most of the painted pieces. After that hour I had a load of blessedly scent-free parts and a really disgusting tub(I have an incredibly patient girlfriend). Everything was laid out to dry overnight.

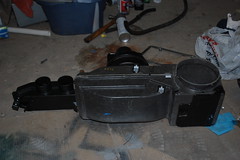
The next morning before work I masked and painted the metal pieces, as well as the screws & hardware. Once I returned home the re-assembly process began. First came gluing in all new foam seals on the various flaps. I have to say I am really unimpressed with the seal kit from Falconparts. The foam for the seals is really thin, the instructions are completely useless, and there was a missing gasket I had to make from some other foam I had.  Last time I did this with my ’62 Comet I used a mustang kit and the materials were higher quality and the instructions at least mentioned each piece.

Eventually it did go together, along with a new blower motor (single speed, but it will work for now), and an ABS plenum to replace the rotted out original plenum. I decided to leave the old heater core in place for now, It didn’t seem worth putting a new one in while there was so much rust & junk in the system. The plan was to replace it when the new engine went in.

Next it went back into the car, It’ll come back out again when I work on the floors so I can properly deal with the surface rust on the firewall and put up some sound deadener. I hooked up the cables,  installed new defroster ducts, and hooked the heater hoses up.

I now had heat.

The next morning I decided that heat meant I could drive the wagon to work. My commute is a 15 mile drive with a 3 mile highway bit near the end. Everything seemed to go well, and on the highway the wagon was doing ok (though the drivetrain gearing limited it to about 65mph) . However just as I came off the highway the heater core failed pretty spectaularly, pouring coolant out of the bottom of the heater box. Wisps of steam were coming out from under the hood. I limped the car to work where it immediately marked it’s spot wit ha puddle of rusty water. The radiator was spraying coolant out of the overflow pipe so violently the firewall at the back of the engine compartment was soaked.

Looks like that “new” engine needs to go in sooner rather than later…

Open up and say ‘ah’

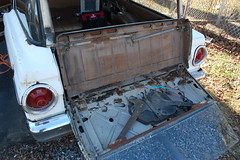
Since I bought the wagon I have not been able to open the tailgate. The power window doesn’t go up and down so it has effectively locked it closed. After futzing with the wiring without any luck I shelved it as “something to deal with in the spring”. However two weekends ago the weather was amazingly warm for the last weekend of January, and I decided to take advantage of it and work on the tailgate. A couple guys on the Ford Falcon News forums gave me some hints on how to get it open and what to look for.

I unbolted the chrome trim around the back, then from inside pried out a dozen-plus rusty screws attaching the metal channels holding the weatherstripping. Once those were unscrewed and pried loose I carefully unlatched the tailgate and pushed it open, prying the weatherstripping mounts as needed to get the door to swing open. Success! The tailgate was now open, with the glass hanging at a disturbing angle since it was never designed to be in the up position without being supported by the channels.

Fighting with a few more screws, I got the back panel off the tailgate(the screws are inaccessible with the door closed), and was able to get at the guts of the door. Bizarrely someone had unplugged the factory wiring from the motor, made new wiring & attached that, then cut it off at the bottom of the tailgate. This explained why playing with the wiring didn’t work, the factory wiring was not in the circuit anymore.

I tested the motor and it worked, albeit sluggishly. Further testing showed the original wiring from the tailgate to the rest of the harness was also intact. So why they’d added the new wiring is a complete mystery. So I reconnected the old wiring, sprayed some grease on the mechanism and buttoned the whole thing back together. Now that I knew the tailgate worked I started messing with the harness. I found at least five places it had been cut within a two foot chunk. A lot of soldering and shrink wrapping and the harness was back intact. However the limit switch(which keeps the window from moving unless the gate is closed) was bad, the key switch on the tailgate is a stripped out mess and the dash switch doesn’t work(even with a new switch). So as a stop-gap measure I jumpered around the limit switch and wired a regular switch inline with the tailgate switch and mounted it on the back bumper. So now I can at least use the tailgate until I can get in again and make further repairs.

So now I have a real station wagon, not just a car with a really awkward storage area behind the back seats.


New toys for the wagon!

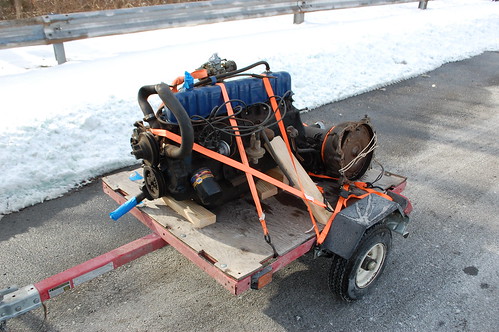
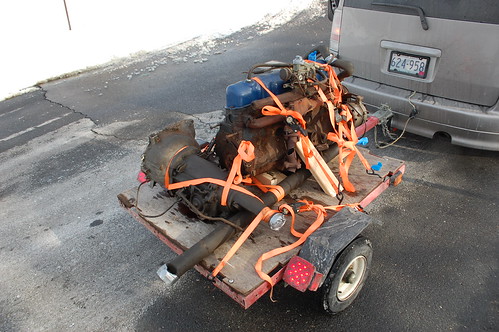
This weekend I was able to pick up this pile of new bits for the wagon. Bright & early Sunday morning I dug the xB & my little utility trailer out of the snow and headed to CT. There I met up with a gentleman who was rebuilding his wife’s 1966 Mustang and was upgrading it to a newer Thunderbird 3.8 V6 & 5-speed. I was able to buy the original 200ci six, C4 transmission, driveshaft and a box of parts & accessories for only $250.

In addition to not having a bad valve, the motor has only 77K miles on it, and allows me to in the same package get a 60 amp alternator(instead of my 30amp generator), automatic choke, and a carb that isn’t leaking gasoline. It does need an exhaust manifold as these are prone to cracking, however the one on my old motor is good. Also the distributor bushings are worn so it slowly goes out of tune. I’ll be trying my distributor, and if that doesn’t work a remanufactured replacement is only $50.

I’m planning to stab the motor in as soon as possible, but the transmission is going to have to wait until at least the spring as going from the 2-speed Fordomatic in the wagon the 3-speed C4 requires a bit more adapting (new driveshaft, transmission crossmember and custom linkage).


Not sure when I’m going to get a chance to swap the motors, so until then everything is sitting wrapped in a tarp on the trailer. This is the joy of trying to get stuff done on a car in New England without a garage. You never know when your work area is going to be under several inches of snow.


Gratuitous wagon shots

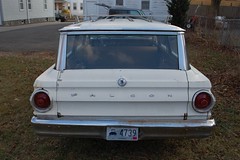
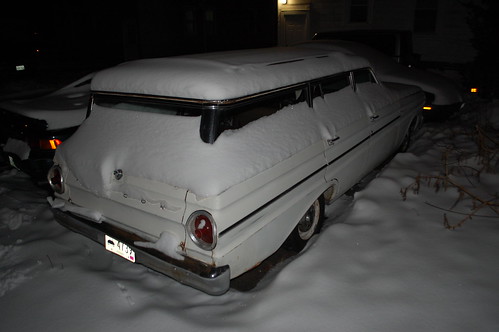
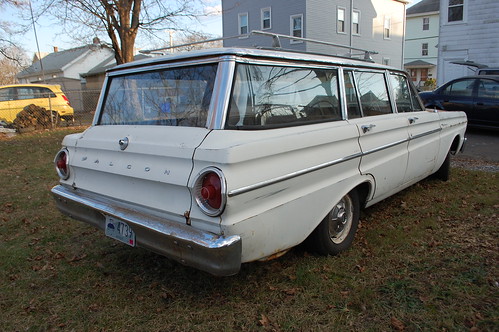
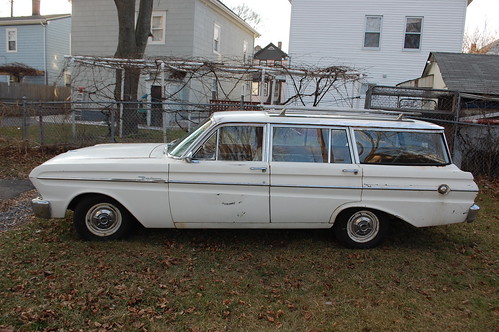
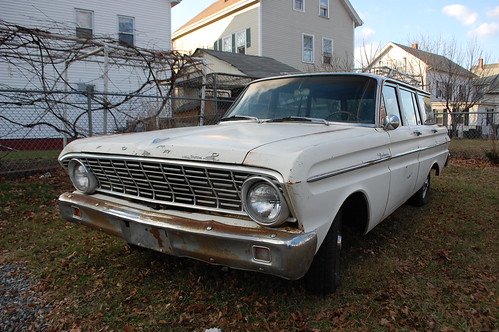
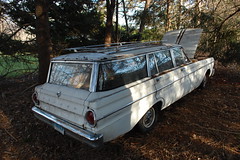
Aside from a couple failed attempts to get the tailgate glass to go down so I can open the tailgate I haven’t had a chance to work on the wagon. So here are some beauty shots from  the weekend I brought it home.

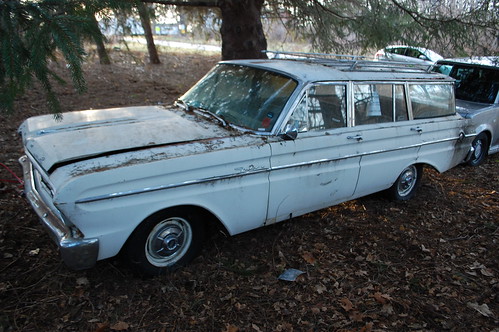
This was once I’d scrubbed the outside clean. Eventually the car will get an exterior restoration and repaint, but for now I’m rather in love with the patina it has.

Got the wagon home & significantly less gross

I brought the wagon home this past weekend. Amazingly with a new battery & some gas it fired up and drove out ofthe yard it was sitting in Brakes/transmission/engine all seem to work (I’m still going to go through them all). The engine runs rough and does seem to have some kind of valve issue, but it runs better than I was lead to believe

Once we had it on the trailer & strapped down I used some waterproofing tape(butyl back aluminum) to seal the roof holes for now to at least stop moisture getting in. Then it was back home with one stop to fill the tank on the wagon and another to spend $10 at a car wash powerwashing as much of the grime of the exterior & engine bay as possible.

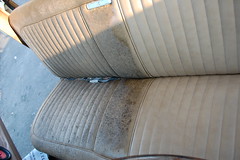
Once home and unloaded we started cleaning it up. The seats & door cards had a massive amount of black mold on them, but bleach and scrubbing did amazing things for the seats as you can see in the half-done shot to the right. The backs of the door cards have rotted cardboard, so a winter project is going to be to try and peel off the vinyl and glue it to new backers.

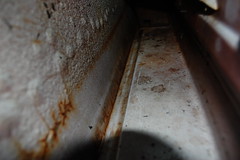
The insides of the door were amazingly rust free, and will only need some minor cleanup & a few coats of Materseries to keep them looking good. The car has an old “Rusty” rustproofing sticker so maybe that is why the doors survived so well. I found some small rust pinholes in the cargo floor & spare tire well, but they should be pretty simple to weld in patches.

After bleaching & scrubbing the seats look quite presentable and I am really happy with them. I tossed the armrests as they were all some combination of stained, moldy & torn; I do have a decent set of red ones that will work for now. Once I get a new filter for my shop vac the interior will get a vacuuming, and I’ll start pulling out the old rubber mat in the back footwell. Unfortunately the power tailgate seems to be DOA, and it would require a bunch of dis-assembly to diagnose so I’m probably going to hold off on dealing with it until the spring.

In addition to the cleaning I got some small jobs done on the car(new exhaust donut gasket, new radiator cap, running some seafoam through the motor, seal tears/cracks in old 1/4 glass & windshield gaskets with RTV). I’m starting to make lists of what the car needs so I can better plan my strategy. Amazingly it runs and drives well enough that I’ve taken it on a few short drives. The next few weeks are going to be skimpy on free time to work on the wagon, but I have a backlog of car shopping posts to finish anyway.

One has been chosen.

I had absolutely no expectation of finding something this (relatively) quickly, and this car is the opposite of nearly everything I’d been looking for. But love is blind, and sometimes bloody stupid. Regardless I am now the (somewhat nervous) owner of this 1964 Ford Falcon wagon.

It is the midrange model and has a few options(automatic transmission, power tailgate window) but is still pretty spartan. The exterior still has the original white paint and the tan seats & door panels are there and decent, though the carpeting & headliner are missing. This car has been sitting under a pine tree for about eight months due to a bad valve. The battery is flat and it won’t start and the tree has left it dirty outside & moldy inside.

According to the previous owner he bought it from Iowa via ebay in 2009 and had a lot of work done(tires/radiator/starter/exhaust/new front floors) to make it a decent driver and used it regularly until “a valve went bad”. However he knows nothing about engines and couldn’t explain it any further. I’m going on the assumption the head is bad on the off chance it means I’ll be pleasantly surprised. My plan is to go out where it is still sitting with a battery & fresh gas to see if i can get it to run enough to at least make loading it on a trailer easier.

Besides the engine the single biggest problem with the car is the roof. The edge of the roof is badly rusted/rotted from above the back doors all the way to the tailgate. This is apparently common on these wagons as condensation forms on the inside of the roof and collects in the edges rotting them out from the inside. I’m going to just seal the holes for right now, and deal with proper repairs in the spring. I’ll probably weld in patches for now and depending on how that ends up looking probably look for a good roof to splice in down the line.

For now though my plan with this car is to make it a reliable beater and just enjoy it without trying to make it perfect. An old wagon with a chrome roof rack and faded original paint is undeniably cool, and should make for a great project.

Of course updates will be posted her as things happen with the wagon, I will also still be posting car shopping entries from the backlog of vehicles I looked at before I bought this.