And the wagon goes away

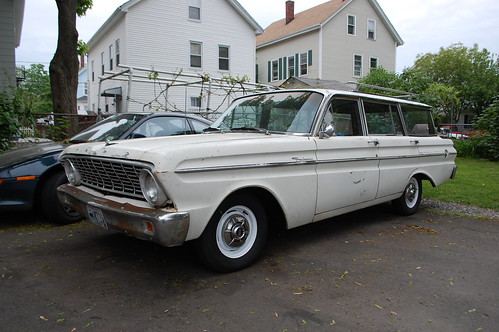
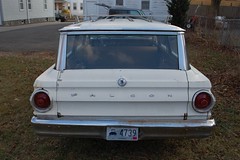
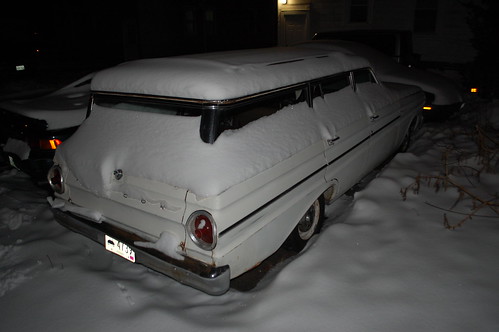
I sold the wagon this weekend. It had been sitting since we bought the house, and I had no enthusiasm to work on it any more. I finally got tired enough of it taking up a garage space for no reason. So it went up on Craigslist and the first person who actually came out to look at it bought it.

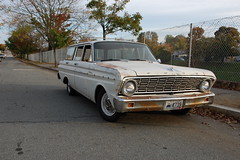
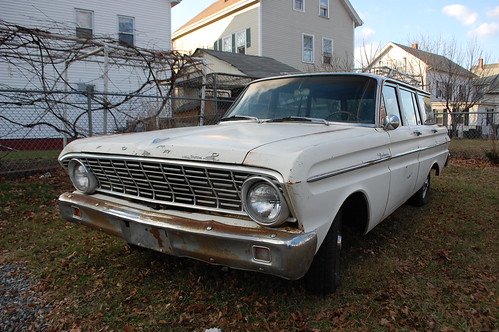
He owns a small gas station and is thinking of getting it logoed up like and old service car. Whatever he does with it, it’ll be getting used instead of just sitting taking up space I don’t really have.


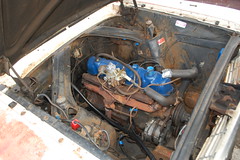
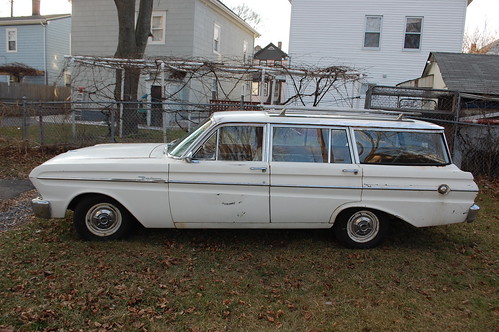
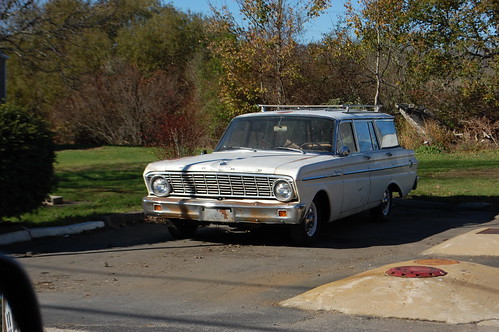
I will miss the wagon, it looked really cool, and on the few occasions when I could drive it it was a lot of fun. But those times were too far and few between and I simply don’t have the money it needed to be made more reliable nor the space to store it until I had that money.


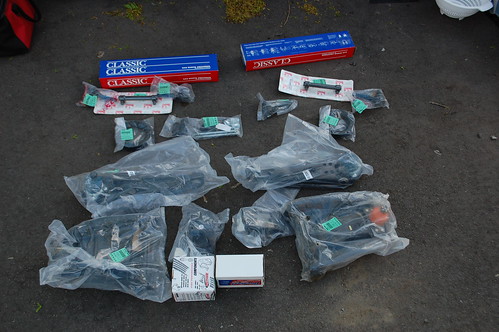
I lost money on it, but then I always lose money on cars I own. I did get enough back out of it to not feel like I got completely screwed. And I’ve already used some of the money to buy things I need for the truck. I’ve got some patch panels, new mirrors and a few other things being shipped to me right now. This past weekend I went to a flea market and found some custom tail lights and a few other pieces.

Also I’ve now got a garage space to put the truck in, so I can work on it without worrying as much about the weather, and our driveway is less cramped. So in the end it was a good thing, but I’m still going to be a bit sad that it is gone.

Project Creep 4, I love it when a car comes together.

Those are all the replacement parts for the front suspension. Everything is being replaced except the spindle, strut rod & spring(all of which don’t have any wear parts). So once I’m done, The wagon will essentially have a brand new front end.

I forgot to take pictures of the installation, probably because I was too busy trying to convince the spring to seat properly. Despite cutting one coil off the springs(to lower the car) they were still a tight fit to get in place with new stiff bushing on all the parts. It turned out the tie rods they sent me as part of the kit were wrong, I had four inner tie rods and no outer tie rods. When I call them they said they’d just found out there supplier had screwed up a whole batch, and they had no correct inner tie rods. I ended up having to order them from another company, which delayed the whole project by an extra week.

Once I’d gotten as far as I could with the suspension, I started putting the sheet metal on. It took surprisingly little time, even with all the fiddling to get things to line up as straight as possible. With as many pieces as there was to put together, I made a few mistakes. I initially had the grille brackets upside down, but fortunately that was an easy fix.

One of the things with doing all of this work was that the area visible through the grille was going to look better, more consistently dark instead of a mishmash of black, rust and the pieces that were white from the factory. It is a little thing, but I always prefer cars where the area behind the grille is all dark, it just looks cleaner and more finished.

The only part of this project I wish I’d been able to do more with was the bumper. I don’t even want perfectly new looking chromed ones, but the level of rust on the current one bugs me. I did grind the rust off the brackets, and shoot them with some paint. However I didn’t bother to take them apart, as I didn’t want to risk stripping out the holes in the bumper.

Altogether I’m really happy with how all this turns out. Under the fenders it looks like a brand new car. Being able to look at something that looked like this, and make it look like this it immensely satisfying.

As soon as the new Tie rods arrived. I was finally able to put the last bits together and get the wagon back on the ground. Even I am amused at how little the three weeks of work show once the car is all together again. But now the steering wheel will actually have a more direct influence on where the car goes.

Project Creep 3, paint and more paint!

If you aren’t sick of seeing parts of a Falcon with paint on them, you will be soon, almost as sick as I was of painting them.

After two coats of Masterseries it was time for primer. I’m using various Rustoleum paints for this, as they are cheap and pretty durable. It may not be professional level restoration quality, but since that isn’t what this car is, it suits me just fine. So several cans of Rusty Metal Primer later and everything was consistently dark orange.

Since there was a lot of waiting for paint to dry, I was jumping somewhat randomly between lots of different parts of the car. So for instance I might find myself painting Masterseries on the inside of the fenders, then putting a coat of primer on front suspension parts. I had an elaborate (and likely baffling to anyone else) system as to where things got placed on the driveway so that I could keep parts from the left & right sides of the car apart so I didn’t cross anything important up.

One thing I learned on a previous project, and utterly failed to remember to photograph here was how I kept all the nuts & bolts organized. as things came off the car, all the relevant hardware would go into a simple ziploc style sandwich bag, and have “Right Fender” or whatever written on it. Then later I’d sort & count what was in that bag and add a list of the contents. I had gotten a Harbor Freight Vibrator Tumbler(which is less exciting than it sounds) for my birthday, so all the hardware got a run through that, which while it didn’t come out looking brand new, definitely cleaned it up significantly. Then it all got a quick coat of spray paint, just to keep it from rusting right back up and making my new paint look a mess.

After primer came the top coat. Everything got two coats of semi-gloss black, then any part that was going to be inside the wheelwell got a coat of truck bed liner to help protect it from stuff kicked up by the tires. I continued on painting the various suspension bits so that everything that was going back on the car would look like new.

One thing I needed to replace was the rubber seal that went between the inner fender & the fender itself to keep the tire from flinging stuff where it would collect and help form more rust. The originals were dry & cracked and basically fell apart when I removed them. I had planned to find some other material to make replacements out of, make patterns and cut new ones. I was even going to do a separate blog post about it. Then I discovered a full set of reproduction pieces was all of $24, so I bought those. Sorry. I ended up using sheet metal screws with extra-wide heads to install them. They were originally stapled on from the factory, but I don’t own any tools capable of punching a staple through 18 ga sheet metal.

Next up, stuff goes back together.

Project Creep part 2, in which a rotted mess fails to materialize

In my last post (two weeks ago, sorry about that) I’d started out replacing the front suspension ,and ended up stripping the front end completely off. The new plan was to check over, derust & repaint all the inner structure, while leaving the exterior looking just as ratty as before. I’m sure some of you are wondering why I don’t just paint over all the worn out paint & surface rust, but I both rather like the patina on the car, and would prefer consistently ratty to a mismatch of ratty & repainted.

First up was assessing what I found. And I was surprised to find just how good everything was. There was surface rust in several places, like the edges of the cowl, the torque boxes, the bottoms of the fenders & inner fenders & under the battery tray. However there was absolutely zero rot anywhere. Not one rot hole to be found. When I pulled apart the “better” of the two ’62 Comets I had, it had been a very different story.

This was all the more surprising considering the piles of pine needles & mulch hidden at the bottom of both fenders and packed into the cowl drains. I can only guess that that stuff dated from the last few years(and in particular the eight months the car sat in the woods before I bought it), rather than the previous decades it sat in a barn. So the moist plant matter didn’t have time to really encourage rot.

The next step (after I spent 45 minutes with a pressure washer removing a garden’s worth of plant debris from inside the cowl) Was to start grinding down all of the rust in preparation for paint. It may not look it in shots like this, but every spot of rust has been diligently gone over with a wire wheel and/or angle grinder. Ford used a rust-colored primer though, so exposing that ended up making the car look more rusty, not less.

I also ground off what I initially though was a layer of undercoating, but eventually realized was actually a sort of clay-heavy dirt that was caked onto every surface of the wheelwell and had been there so long it had taken on the appearance of being part of the original car. I eventually was able to get everything looking as shiny new as I could, and was able to start putting paint on, instead of grinding it off.

Lets hear it for Masterseries paint, This is my absolute favorite rust-sealing paint, and I’ve been through at least 3-4 quarts so far on various projects (and have two more I just bought sitting in the garage for later on this car). I put a nice thorough coat onto everywhere I’d found rust, making sure to get it into and gaps or cracks where rust might fester. As much as I wanted to just coat everything, I had to prioritize as I was low at the time and didn’t have time to wait for more to be delivered. So stuff ended up looking a bit odd, with seemingly random silver painted bits over the worn old paint. And, of course, because the universe likes to mess with me, it started to drizzle the moment I was done paints, necessitating an emergency solution.

Next up, painting and more painting.

Project creep, part one

The plan was simple, replace the worn out front suspension with all new parts so that the steering wheel would feel more like it had a say in the direction the wagon went. To that end I ordered a complete rebuild kit that had nearly every piece I needed, and on Saturday started pulling the old parts off.

All things considered it came apart surprisingly easily. The tie rods were stuck in place, but after some enthusiastic hammering they popped loose. Compared to other times I did this job this was a cakewalk, no stripped nuts, no rusted in place bolts. Everything came apart with simple hand tools. I spent about 1.5 hours on saturday getting the driver’s side completely removed, and got a good start on the passenger side before having to clean up for a friend’s party.

It was an OMGWTFBBQ!!1!, where you’re supposed to bring weird or disturbing food. We brought a meat cake. Two layers of pork & beef meatloaf frosted with mashed potatoes and iced with ketchup.

Yeah, we’re weird.


Sunday found me back out working on the wagon. One great surprise during all of this was the front brakes. The guy I bought the wagon off of told me he didn’t think his mechanic had touched the brakes, so despite them working well I was already budgeting for a complete brake overhaul. So imagine my surprise when I pulled the drums and found front brakes that looked like brand new.

Everything in here looks like new, the pads have tons of meat on them, and the rubber parts are in great condition. Even if the rest of the system is junk this is $100+ in savings right here. Regardless they were removed for now, and eventually the suspension was stripped down to the bare spindles. The spindles, strut rods & springs are the only parts I am re-using, so they will get cleaned up and repainted before going back on.

the squiggles are from a quick pressure-washing before I started, turns out pressure washers remove old undercoating

Eventually I was left with two empty wheel wells. I had planned to paint the mounting points for the suspension before re-assembly so I wouldn’t have to take it back apart to paint those later. Looking at the space in the wheelwell I decided it would make even more sense to clean up and paint the entires wheelwell area while the suspension was out of the way. I started cleaning in here, then realized that if I was going to repaint in here, it would be even easier if I cold reach everything.

And so the project creep begins.

Going…

Going…

Gone.

In the next post I start in on the rust cleanup and repainting.

Engine swap, woefully under-photographed.

As I mentioned in the last entry about the wagon, the engine had violently overheated while trying to drive the Falcon to work. Since I already had a spare engine for it waiting, I filled the radiator with water, cut & re-routed the heater hoses to take the now blown heater core out of the circuit, and limped her home, staying off the highway. On the way home I stopped and rented an engine hoist, & loaded it in the back.

While it had been bright & warm when I left work at noon, by the time I got home at 1:30 it had remembered it was early February and gotten cold & grey, with erratic drizzle. However I was already going to have to pay for the engine hoist so I pushed on with the swap anyway. You can see however why taking photos was not my priority.

I started disconnecting things, sawing off radiator hoses and generally swearing up a storm. After about an hour I had the motor disconnected to the point where I could start actually pulling. Ford sixes have no good place to hook up chains to yank them, ,so I ended up using two ratchet straps from my trailer to form slings front & rear. With my girlfriend manning the engine hoist I pushed pulled, pried & kicked the engine free of the transmission and guided it out of the engine bay & down to the pavement.

Once the old lump had been pried free, there was a bit of jockeying engine hoist & straps to get the “new” engine secured. Then that was lifted, swung around, and dropped into place.

Ok, that last sentence is technically correct, however what it leaves out is the 1.5 hours that it took pulling, prying, levering, shoving, swearing, bashing, cursing, praying, etc. to get the engine & transmission to line up and slide together. I hate putting engines in when the transmission is already in place, and doing in a cold driveway while being drizzled on does not improve the experience.

Once the engine was in place and bolted to the transmission and frame, the engine hoist was disassembled & loaded into Box to be returned and I went upstairs to shower off. Over the next few weeks the cold weather hung around, and once it started to lift my work went on insane amounts of mandatory overtime. So the wagon sat with the engine in place but other wise unattached for almost a month before I could carve out some time to start reconnecting everything. Most of it went smoothly, and with few surprises. I couldn’t help but be amused to use guides I had written up myself to rewire the car for an alternator & modify the radiator support to fix an thicker radiator. The only issue I had was swapping out the cracked exhaust manifold for the good one from the old engine. That was enough of a project to warrant it’s own blog post, so that will be coming soon.

Hot stuff, in the good, then bad way

About two weeks ago I decided to finally use the parts I ordered from Falconparts to get the heat working in the wagon. The heating system was completely non-functional all playing with the levers would get you is a faint smell of mouse pee. After unhooking the heater hoses & unbolting the heater box I crawled under the dash to disconnect it. Clearly I’d been lucky with the faint wiffs of pee, the heater box was both full of, and topped with mouse nests.

After pulling the heater box out and dragging it downstairs I cracked it open. Lets just says you should be incredibly grateful this blog is not in Smell-O-Vision or you’d be desperately deleting these pictures.  The picture to the right is after I pulled out the worst of the still-damp mouse nests. I pulled everything apart & vacuumed up what I could, then carried everything upstairs.

I then spent the next hour bent over the tub scrubbing the ever loving hell out of every square inch of all the pieces. I scrubbed so hard the paint came off most of the painted pieces. After that hour I had a load of blessedly scent-free parts and a really disgusting tub(I have an incredibly patient girlfriend). Everything was laid out to dry overnight.

The next morning before work I masked and painted the metal pieces, as well as the screws & hardware. Once I returned home the re-assembly process began. First came gluing in all new foam seals on the various flaps. I have to say I am really unimpressed with the seal kit from Falconparts. The foam for the seals is really thin, the instructions are completely useless, and there was a missing gasket I had to make from some other foam I had.  Last time I did this with my ’62 Comet I used a mustang kit and the materials were higher quality and the instructions at least mentioned each piece.

Eventually it did go together, along with a new blower motor (single speed, but it will work for now), and an ABS plenum to replace the rotted out original plenum. I decided to leave the old heater core in place for now, It didn’t seem worth putting a new one in while there was so much rust & junk in the system. The plan was to replace it when the new engine went in.

Next it went back into the car, It’ll come back out again when I work on the floors so I can properly deal with the surface rust on the firewall and put up some sound deadener. I hooked up the cables,  installed new defroster ducts, and hooked the heater hoses up.

I now had heat.

The next morning I decided that heat meant I could drive the wagon to work. My commute is a 15 mile drive with a 3 mile highway bit near the end. Everything seemed to go well, and on the highway the wagon was doing ok (though the drivetrain gearing limited it to about 65mph) . However just as I came off the highway the heater core failed pretty spectaularly, pouring coolant out of the bottom of the heater box. Wisps of steam were coming out from under the hood. I limped the car to work where it immediately marked it’s spot wit ha puddle of rusty water. The radiator was spraying coolant out of the overflow pipe so violently the firewall at the back of the engine compartment was soaked.

Looks like that “new” engine needs to go in sooner rather than later…

Open up and say ‘ah’

Since I bought the wagon I have not been able to open the tailgate. The power window doesn’t go up and down so it has effectively locked it closed. After futzing with the wiring without any luck I shelved it as “something to deal with in the spring”. However two weekends ago the weather was amazingly warm for the last weekend of January, and I decided to take advantage of it and work on the tailgate. A couple guys on the Ford Falcon News forums gave me some hints on how to get it open and what to look for.

I unbolted the chrome trim around the back, then from inside pried out a dozen-plus rusty screws attaching the metal channels holding the weatherstripping. Once those were unscrewed and pried loose I carefully unlatched the tailgate and pushed it open, prying the weatherstripping mounts as needed to get the door to swing open. Success! The tailgate was now open, with the glass hanging at a disturbing angle since it was never designed to be in the up position without being supported by the channels.

Fighting with a few more screws, I got the back panel off the tailgate(the screws are inaccessible with the door closed), and was able to get at the guts of the door. Bizarrely someone had unplugged the factory wiring from the motor, made new wiring & attached that, then cut it off at the bottom of the tailgate. This explained why playing with the wiring didn’t work, the factory wiring was not in the circuit anymore.

I tested the motor and it worked, albeit sluggishly. Further testing showed the original wiring from the tailgate to the rest of the harness was also intact. So why they’d added the new wiring is a complete mystery. So I reconnected the old wiring, sprayed some grease on the mechanism and buttoned the whole thing back together. Now that I knew the tailgate worked I started messing with the harness. I found at least five places it had been cut within a two foot chunk. A lot of soldering and shrink wrapping and the harness was back intact. However the limit switch(which keeps the window from moving unless the gate is closed) was bad, the key switch on the tailgate is a stripped out mess and the dash switch doesn’t work(even with a new switch). So as a stop-gap measure I jumpered around the limit switch and wired a regular switch inline with the tailgate switch and mounted it on the back bumper. So now I can at least use the tailgate until I can get in again and make further repairs.

So now I have a real station wagon, not just a car with a really awkward storage area behind the back seats.


New toys for the wagon!

This weekend I was able to pick up this pile of new bits for the wagon. Bright & early Sunday morning I dug the xB & my little utility trailer out of the snow and headed to CT. There I met up with a gentleman who was rebuilding his wife’s 1966 Mustang and was upgrading it to a newer Thunderbird 3.8 V6 & 5-speed. I was able to buy the original 200ci six, C4 transmission, driveshaft and a box of parts & accessories for only $250.

In addition to not having a bad valve, the motor has only 77K miles on it, and allows me to in the same package get a 60 amp alternator(instead of my 30amp generator), automatic choke, and a carb that isn’t leaking gasoline. It does need an exhaust manifold as these are prone to cracking, however the one on my old motor is good. Also the distributor bushings are worn so it slowly goes out of tune. I’ll be trying my distributor, and if that doesn’t work a remanufactured replacement is only $50.

I’m planning to stab the motor in as soon as possible, but the transmission is going to have to wait until at least the spring as going from the 2-speed Fordomatic in the wagon the 3-speed C4 requires a bit more adapting (new driveshaft, transmission crossmember and custom linkage).


Not sure when I’m going to get a chance to swap the motors, so until then everything is sitting wrapped in a tarp on the trailer. This is the joy of trying to get stuff done on a car in New England without a garage. You never know when your work area is going to be under several inches of snow.


Gratuitous wagon shots

Aside from a couple failed attempts to get the tailgate glass to go down so I can open the tailgate I haven’t had a chance to work on the wagon. So here are some beauty shots from  the weekend I brought it home.

This was once I’d scrubbed the outside clean. Eventually the car will get an exterior restoration and repaint, but for now I’m rather in love with the patina it has.